Bake Banana Cake with Creamy Peanut Butter
Feeling nostalgic? Bake Banana Cake with Creamy Peanut Butter just like my grandma did! This sweet and nutty delight is perfect for gatherings or cozy weekends.

- Let’s Bake Banana Cake with Creamy Peanut Butter
- A Bit of Background
- Why You’ll Love This Cake
- Onward to the Ingredients!
- Your Essential Ingredients Guide for Baking Bliss
- Professional Cooking Method: Baking a Delightful Banana Cake
- Pro Tips & Secrets for Your Bake Banana Cake with Creamy Peanut Butter
- Perfect Presentation: Make It Look as Good as It Tastes!
- Storage & Make-Ahead: Because That’s a Game Changer
- Creative Variations: Make It Your Own!
- Complete Nutrition Guide: Get Your Facts Straight
- Expert FAQ Solutions: You’ve Got Questions, I’ve Got Answers
- Recipe Card
Let’s Bake Banana Cake with Creamy Peanut Butter
Oh my gosh, have you ever had a recipe that just takes you back to childhood? i remember the first time i made bake banana cake with creamy peanut butter .
I had some overripe bananas sitting on the counter, staring at me like they were begging for a second chance.
You know the kind? the ones nobody wants to eat but are perfect for baking! i thought, “why not throw them in a cake?” and just like that, i was hooked!
Baking has this magical way of transforming simple ingredients into something special, right? plus, what could be better than a moist banana bread cake crowned with creamy peanut butter frosting ? it’s like a hug in dessert form.
Trust me; your friends will be begging for the recipe!
A Bit of Background
This delightful cake has roots that trace back to those comforting banana recipes we all know and love. bananas have been a baking staple for ages, and they’re surprisingly versatile.
Thanks to their natural sweetness and moisture content, they make the perfect partner for baking. let’s face it—who doesn’t love a slice of cake with ripe bananas?
These days, the easy banana cake recipe has taken off. it’s a go-to for birthdays and casual gatherings alike, catching the attention of cake lovers everywhere.
With just about an hour from start to finish, you can whip up this sweet and nutty cake . not to mention, it’s budget-friendly! you can feed about 10 people with this recipe without emptying your wallet.
Why You’ll Love This Cake
Let’s talk about the best parts! first up, it’s packed with health benefits. bananas are loaded with potassium and fiber , making this a guilt-free treat.
And then there’s the creamy peanut butter frosting —we’re not just slapping some preservatives on here! it’s made from real ingredients, and it gives you that nutty goodness we all crave.
This cake is perfect for those special occasions—think birthday parties or comfort food desserts on a rainy day. And if you’re into make-ahead cake recipes , you’ll love that it actually gets better after sitting in the fridge for a day or two! Plus, if chocolate is your jam, why not throw in some dark chocolate chips? Honestly, there are so many banana and peanut butter pairings to explore; the possibilities are endless!
If you've been searching for healthy dessert alternatives , you’re in luck! you can swap out traditional flour with gluten-free options or use almond butter instead of peanut butter if you're picky about nut-free banana cake alternatives .
Onward to the Ingredients!
Now that i’ve hopefully made your mouth water and your heart happy with this breakdown, let's get to the fun part—gathering our ingredients! grab your ripe bananas, some creamy peanut butter, and all the essentials because we’re about to create something truly special.
I promise you, once you learn how to bake banana cake and add that stellar frosting, you won't just make it once.
You’ll want to share it with the world!
Can't wait to dive into the ingredients next! trust me, once you take a bite of this cake, you’ll be dreaming about banana baking tips and cake decorating ideas long after the last slice is gone.
Ready to get started? let’s go!
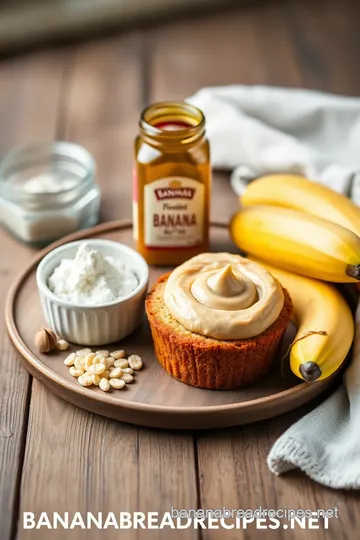
Your Essential Ingredients Guide for Baking Bliss
Alright, friends! if you wanna bake something fabulous, it all starts with knowing your ingredients. let’s dive into the essentials that’ll not only up your baking skills but also make your kitchen the talk of the town.
Trust me, this will help you bake banana cake with creamy peanut butter like a pro.
Premium Core Components
When it comes to baking, let’s get specific. You want:
-
Measurements that matter: whether you’re in the us or somewhere else, knowing that 1 ½ cups (190g) of flour equals the same amount of ingredient consistency you get is key.
You've gotta nail that ratio for a moist banana bread .
-
Quality Indicators: Look for things like shiny sugar and bright yellow butter . That’s your gold standard, my friends.
-
Storage guidelines: keep your flour in a cool, dry place and make sure your eggs are not past their expiration date.
Fresh eggs can last 3-5 weeks , but i don’t like to push it.
-
Freshness Tips: Pick ripe bananas that are spotted for max flavor. You know, the ones you might have thought twice about buying last week? Those are the ones you want.
Signature Seasoning Blend
Now let’s talk flavor! A cake is only as delicious as the spices you use. Here’s what you need:
-
Essential Spice Combinations: Think cinnamon and nutmeg. Just a pinch of each can take your flavors to the next level.
-
Herbs Selections: Basil and banana? Odd combo, but hear me out. There’s something about that freshness that works surprisingly well in certain banana baking tips !
-
Flavor Enhancers: Vanilla extract is a must-have. A little splash can brighten up anything, especially in that homemade cake frosting you are dreaming about.
-
Regional Variations: Love coconut? Throw in some shredded coconut for a tropical twist.
Smart Substitutions
Not all of us can stick to the script, and that’s okay! Here are some swaps:
-
Common Alternatives: No buttermilk? Mix regular milk with a splash of vinegar. Close enough, right?
-
Dietary Modifications: Need gluten-free? Use almond flour or a specialized blend. It’ll give you that moist and fluffy dessert feel you crave.
-
Emergency Replacements: Running low on peanut butter? Sun butter’s a decent stand-in!
-
Seasonal Options: Pumpkin spice when it’s fall? Oh yeah, that’s a vibe!
Kitchen Equipment Essentials
Now that you're all prepped with ingredients, let’s organize your workspace! Here’s your go-to list:
-
Must-Have Tools: Mixing bowls, measuring cups, and a hand mixer—don’t try to beat ingredients by hand unless you want a workout!
-
Alternative Equipment Options: If you don’t own a stand mixer, no sweat. A good ol’ fork will do in a pinch for less dense mixtures.
-
Preparation Tips: Always preheat your oven while mixing to save time.
-
Storage Solutions: Invest in a good food storage container for those leftover cake slices. You want to keep them fresh longer!
So now that you’ve got the lowdown on your essentials, get ready to make something divine ! time to bake banana cake with creamy peanut butter .
It’s gonna be a hit at any gathering, especially perfect for birthdays! just think about how happy your friends will be when they see a slice of that sweet and nutty cake waiting for them.
In our upcoming instructions section, we’ll dive into the nitty-gritty of how to whip this beauty up! whether you’re a newbie or a seasoned baker, let’s make this easy banana cake recipe work for you.
Get those bananas ready! 🍌
Professional Cooking Method: Baking a Delightful Banana Cake
If you love to bake, you've probably heard of the classic “bake banana cake with creamy peanut butter.” let me tell you, this recipe is a total game-changer! it's easy to whip up, and the flavor combo of ripe bananas and creamy peanut butter is something you just can’t resist.
Honestly, it’s like sunshine on a plate!
Essential Preparation Steps
Mise en place is your best friend here. before diving in, gather all your ingredients and tools. you don’t want to be scrambling for flour when you should be blending the batter.
So, grab your measuring cups , mixing bowls, and an electric mixer. trust me; it makes everything smoother.
Time management is key. you’ll spend about 15 minutes prepping. that includes mashing 3 ripe bananas and combining your dry ingredients.
While the cake bakes for about 30- 35 minutes at 350° f ( 175° c) , you can prepare your creamy peanut butter frosting .
Now, let’s talk about organization strategies . keep your workspace tidy. clean as you go! that way, you avoid any crazy mess when it’s time to layer your cake, and it’ll also help keep your mental state clear.
Plus, it looks super professional!
Don’t forget about safety considerations . When using any electric mixer, keep your fingers and utensils away from the beaters while it’s running. A little caution goes a long way!
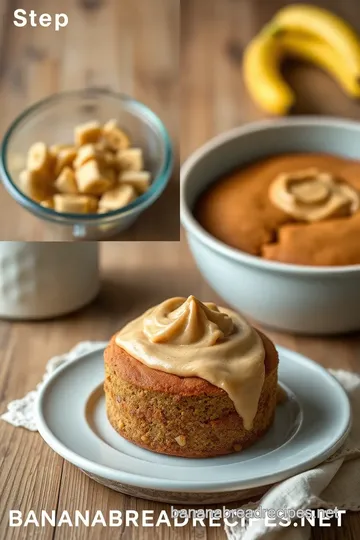
Step-by-Step Process
Let’s break it down! Here’s how to bake your banana cake in step-by-step glory:
-
Preheat Oven: First off, preheat that oven to 350° F ( 175° C) and grease those cake pans.
-
Combine Dry Ingredients: Whisk together 1 ½ cups of flour , 1 teaspoon baking powder , 1 teaspoon baking soda , and ½ teaspoon salt in a medium bowl.
-
Cream Butter and Sugar: In a larger bowl, cream together ½ cup unsalted butter and 1 cup granulated sugar until light and fluffy. It should take about 3- 5 minutes.
-
Add Eggs and Bananas: Mix in 2 large eggs one at a time, followed by your mashed bananas and 1 teaspoon vanilla extract .
-
Incorporate Dry Ingredients: Gradually add the dry mix to the wet mix, alternating with ½ cup buttermilk . Start and end with the flour mixture; it makes for a fluffier cake!
-
Bake: Pour the batter evenly into your prepared pans. Bake for 30- 35 minutes . A toothpick should come out clean when you poke the center. Trust your instincts!
-
Cool Cakes: Let them cool for about 10 minutes in the pans, and then transfer them to a cooling rack.
-
Prepare frosting: while the cake cools, beat together ½ cup creamy peanut butter and ½ cup butter until smooth. gradually add 3 cups powdered sugar along with milk until you achieve the perfect consistency.
-
Frost the Cake: Once cooled, layer and frost your cakes. Get creative with your frosting technique. A little swirl can add some flair!
Expert Techniques
Now here’s where the real magic happens! Use fresh ripe bananas for maximum flavor. And remember, hungry kids can be your best help in the kitchen —baking is always more fun together!
Keep an eye on temperature control ; don’t open that oven door too soon! you want to maintain the heat for a perfectly baked cake.
Aim for a final internal cake temperature of around 200° f ( 93° c) when it’s perfectly done.
Quality checkpoints are crucial. Does your cake rise evenly? That’s a good sign! If it sinks in the middle, it might need a few adjustments next time.
Success Strategies
We’ve all made mistakes in the kitchen, right? Avoid over-mixing your batter; it can lead to a dense cake. And make sure to let your cake cool INCREDIBLY well before frosting; trust me, it saves you from a gooey mess!
For quality assurance, taste your frosting ! Adjust the sweetness to your liking, adding a pinch of salt can enhance that peanut butter goodness.
Feeling adventurous? Test out some make-ahead options ! The cake can be stored for a day at room temperature before frosting, or you can freeze it for later use.
And voilà! you’ve just mastered the art of baking a moist banana bread transformed into a cake. this is a fun recipe that turns out moist and fluffy , perfect for a birthday or just because.
Next up, let’s dive into some Additional Information on how to jazz up your banana cake even more!
Pro Tips & Secrets for Your Bake Banana Cake with Creamy Peanut Butter
Alright, let’s chunk down some pro tips and secrets to elevate your experience. When I first tried my hand at baking a moist banana bread , I made a lot of mistakes! But hey, that’s part of the fun, right? Here’s what I learned to help you whip up a delicious cake without all the rookie errors!
Chef's personal insights: always use ripe bananas for that sweet, rich flavor. i swear, the riper, the better! if you don’t have ripe ones, you can bake at 300° f for about 20 minutes to soften them up.
Genius, right?
Time-saving techniques: prep all your ingredients before mixing. trust me, it’ll save you from frantic scrambling. i learned the hard way, trying to find baking powder while my butter was melting down.
Total chaos!
Flavor enhancement tips: a pinch of salt in your frosting? yes, please! it amplifies the flavor. you could also experiment with adding a touch of cinnamon to the batter.
I mean, cinnamon and bananas? total match made in heaven!
Presentation advice: don’t be shy when it comes to frosting! a nice, thick layer of creamy peanut butter frosting just makes everything pop.
The first time i made this, i used a simple spatula. now, i love the offset spatula technique—makes it look so fancy!
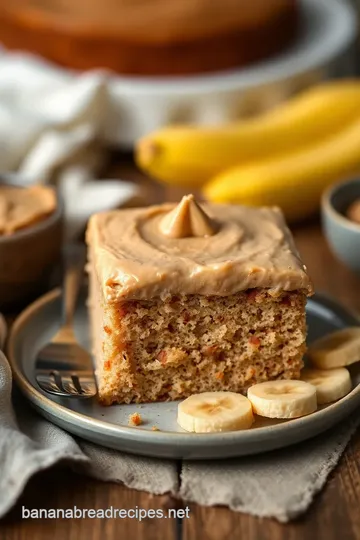
Perfect Presentation: Make It Look as Good as It Tastes!
Let’s get to the visual appeal . We eat with our eyes first, am I right?
Plating techniques: when stacking your cake layers, slightly offset them for a fun look. it adds dimension and simply feels more inviting.
Plus, it’s great for those snapping pics for social media. gotta get those likes!
Garnish Ideas: A sprinkle of chopped peanuts on top will give it that restaurant-vibe. Or maybe some banana chips? They provide an unexpected crunch and look super cute!
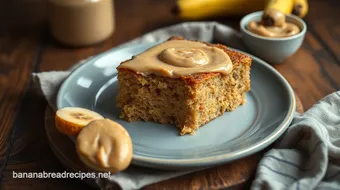
Color combinations: using a white plate makes banana cake with creamy peanut butter frosting pop with its golden tones. if you’re feeling cheeky, try a colored plate that complements the cake’s yellow hue.
Visual Appeal Tips: Always slice your cake with a hot knife; it makes for a cleaner cut. You can run it under hot water and dry it off—who knew something so simple could make such a difference?
Storage & Make-Ahead: Because That’s a Game Changer
Now, about that make-ahead strategy . Life’s busy, and you don’t want to be rushing on the day of your gathering. Here’s what I do:
Storage Guidelines: Keep any leftovers in an airtight container at room temperature for up to three days. Honestly, I doubt it’ll last that long because it’s THAT good!
Preservation Methods: You can freeze the cake layers separately. Wrap ’em well in plastic wrap, then foil—perfect for a later date. Just thaw overnight in the fridge.
Reheating Instructions: If you want a slice warm, microwave it for about 10 seconds. Top it with ice cream right after, and you’ve got yourself a mini dessert wonderland.
Freshness duration: typically, the cake stays fresh for about a week in the fridge, assuming it actually makes it that long! you can also check for mold and still see if it smells good.
Creative Variations: Make It Your Own!
Now, onto the fun part— creative variations . You know, just because you’ve got a great recipe doesn’t mean you can’t make it even better!
Flavor Adaptations: Try jazzing it up with chocolate chips or walnuts in the batter. Holy moly, sweet and nutty cake is a winner!
Dietary Modifications: Need gluten-free options? Use almond flour or a gluten-free flour mix to keep the moistness. The cake is still gonna rock!
Seasonal Twists: When fall rolls around, toss in some pumpkin spice. Trust me, your taste buds will thank you!
Regional Variations: Ever tried a Southern-style banana cake? Add a dash of bourbon into your frosting. You’ll feel like you’re sitting on a porch on a warm summer evening!
Complete Nutrition Guide: Get Your Facts Straight
You wanna know what you’re eating, right? Let’s break it down:
- Calories: About 320 per slice.
- Protein: Roughly 5g.
- Fat: Yes, it has some, about 15g.
- Carbs: Coming in at 45g, but it’s all worth it!
Focus on enjoying this comfort food dessert without guilt. With bananas and peanut butter, you'll reap those health benefits while indulging. Talk about a win-win!
Expert FAQ Solutions: You’ve Got Questions, I’ve Got Answers
Got questions? Here’s the scoop:
- Common Questions: Can I sub organic or natural peanut butter? Sure! Just know it might change the consistency a bit.
- Troubleshooting Guide: If your cake isn’t rising, make sure your baking soda is fresh. I'd learned that the hard way!
- Success Tips: Don’t overmix the batter; it can make it dense. Just mix until you see no dry flour.
- Variations Explained: Want to skip the frosting? Use whipped cream instead. Totally a game changer!
So, next time you want to bake a banana cake with creamy peanut butter , remember all these goodies! whether you're hosting a birthday or just treating yourself, this cake is an easy banana cake recipe you won’t forget.
Now go get your bake on!
And hey, happy baking! You got this!
Bake Banana Cake with Creamy Peanut Butter Card
⚖️ Ingredients:
- 1 ½ cups (190g) all-purpose flour
- 1 tsp (5g) baking powder
- 1 tsp (5g) baking soda
- ½ tsp (2g) salt
- ½ cup (115g) unsalted butter, softened
- 1 cup (200g) granulated sugar
- 2 large eggs
- 1 tsp (5ml) vanilla extract
- 3 ripe bananas, mashed (approximately 1 ½ cups or 360g)
- ½ cup (120ml) buttermilk
- ½ cup (115g) creamy peanut butter
- ½ cup (115g) unsalted butter, softened
- 3 cups (360g) powdered sugar
- 2-4 tbsp (30-60ml) milk
- 1 tsp (5ml) vanilla extract
🥄 Instructions:
- Step 1: Preheat the oven to 350°F (175°C). Grease and line cake pans with parchment paper.
- Step 2: In a medium bowl, whisk together flour, baking powder, baking soda, and salt.
- Step 3: In a large mixing bowl, beat softened butter and sugar until light and fluffy.
- Step 4: Mix in the eggs one at a time, followed by the mashed bananas and vanilla extract until well combined.
- Step 5: Gradually add the dry ingredients to the wet mixture, alternating with buttermilk, starting and ending with flour.
- Step 6: Divide batter evenly between prepared pans. Bake for 30-35 minutes or until a toothpick comes out clean.
- Step 7: Allow cakes to cool in pans for 10 minutes, then transfer to a cooling rack to cool completely.
- Step 8: In a mixing bowl, beat peanut butter and butter until smooth; gradually add powdered sugar, milk, and vanilla until achieving desired consistency.
- Step 9: Once cakes are completely cool, place one layer on a serving plate, frost the top, then place the second layer on top and frost the entire cake.
- Step 10: Serve and enjoy your Bake Banana Cake with Creamy Peanut Butter!
Previous Recipe: How to Bake Gluten-Free Muffins with Peanut Butter: My Family’s Ultimate Favorite!
Next Recipe: How to Bake Banana Cake - Moist & Flavorful Delight: A Family Classic