Classic Homemade Bread with Oster Breadmaker
Looking for the perfect bread recipe? This classic homemade bread in your Oster breadmaker comes with tips for an aromatic, crusty loaf everyone will love!

- A Slice of Nostalgia: Making Classic Homemade Bread with Your Oster Breadmaker
- The Joy of Homemade Bread: A Quick Recipe Overview
- Why This Bread Rocks: Key Benefits
- Making Your Kitchen Smell Amazing!
- Unlocking the Secrets of Essential Ingredients
- Mastering the Art of Professional Cooking with Oster Breadmakers
- Additional Recipe Information for Classic Homemade Bread with Oster Breadmaker
- Recipe Card
A Slice of Nostalgia: Making Classic Homemade Bread with Your Oster Breadmaker
Oh my gosh, if there’s one thing that takes me back, it’s the smell of fresh bread baking in the oven.
Growing up, my mom used to whip up loaves on chilly days. it wasn’t just food; it felt like a warm hug.
Now, with oster breadmakers , i can relive that delicious memory without the heavy lifting. i mean, who doesn’t want to dive into a crusty homemade bread that’s warm and just waiting for some butter?
So, have you ever thought about how magical it is to make your own bread? like, seriously! just think about taking a bite out of a perfectly baked loaf while it’s still warm.
🥖 let’s explore this together, and i promise you won’t regret giving it a whirl.
The Joy of Homemade Bread: A Quick Recipe Overview
Historically, bread has been a staple in many cultures. from ancient egyptians baking their own yeast bread recipes to the loaves we enjoy today, it’s always been a symbol of comfort and sustenance.
Fast forward to now, and it’s the centerpiece of bake sales and family dinners alike.
Using an oster bread machine gives you a chance to join in that tradition without the fuss. this recipe is perfect if you’re just starting out or looking for easy bread recipes that don’t take all day.
Prep only takes about 10 minutes , and then you let your breadmaker work its magic for about 3 hours .
Seriously, after you set it up, you can chill out like you deserve!
And let’s talk about cost—making bread at home is super affordable! for roughly the price of a couple of store-bought loaves, you can whip up 12 slices of classic homemade bread that taste like heaven.
Why This Bread Rocks: Key Benefits
Now, what’s all the hype about? first, the health benefits speak volumes. homemade bread eliminates the fake ingredients you might find in store-bought loaves.
You get to control what’s inside. go with whole wheat flour as a substitute and incorporate flavorful bread additives like seeds, and bam! you’re on your way to a nutritious treat.
This classic homemade bread is perfect for special occasions, whether it’s sunday brunch or a cozy dinner with friends. you can toast it for breakfast or slather on jam for afternoon snacks.
The possibilities are endless!
Plus, it outshines similar recipes you might find. why? it's simple! using an oster breadmaker makes it easier to get that perfect bread dough consistency without breaking a sweat.
Unlike many traditional recipes that often leave you guessing, this guarantees results—you’ll achieve that golden crust and tender crumb reliably every time.
You’ll turn into a bread-making pro in no time!
So, are you ready to dive into the delicious world of fresh bread baking? gather your dough ingredients and let’s get started.
The first step is just around the corner, and i’ll guide you through it all.
Making Your Kitchen Smell Amazing!
Before we jump into the ingredients, remember this: making bread can be a little intimidating at first, but trust me—it doesn’t need to be! with breadmaker baking tips , and a bit of patience, you’ll create something truly special.
Don’t stress about getting it perfect. just enjoy the process, and let your oster breadmaker do its thing.
So, let’s gather what you need to make that classic homemade bread . Here’s what’s on tap!

Unlocking the Secrets of Essential Ingredients
Let’s dive into tasty territory—ingredients! high quality can transform an okay dish into something mind-blowing. and guess what? whether you’re using your oster bread machine or whipping up a family favorite on the stovetop, getting the right components is half the battle won.
So, grab your measuring cups!
Premium Core Components
When i think about breadmaking , i get a bit giddy! there’s something really special about creating homemade bread that smells like heaven.
So, here’s the lowdown on your essential ingredients. first, let’s talk measurements . use 4 cups (500g) of all-purpose flour and 1 ½ cups (360ml) of warm water .
Quite simple, right? a great trick i learned is to always warm that water to about 110° f ( 43° c) .
It wakes that active dry yeast right up!
Quality indicators ? Look for flour that's soft and has a fine texture. Trust me; it makes a difference! For the yeast, you want freshness—check the expiration date.
Now onto storage! keep flour in a cool, dark place in an airtight container. it’s good for about 6-12 months .
Yeast? well, i’ve learned the hard way—it can lose its oomph if left out too long. stick it in the fridge for best results!
Signature Seasoning Blend
Okay, so you’ve nailed your base ingredients, but what’s a loaf without some pizzazz? you need those signature spices and herbs! bread isn’t just about flour; it’s a blank canvas! think about mixing in 1 teaspoon of salt and some olive oil.
It makes all the difference! i like using garlic powder and dried herbs for an extra kick. you should definitely explore regional variations, too.
Italian, french, and even southern cornbread vibes can take your bread to another level!
Smart Substitutions
We all have those “oops!” moments in the kitchen, don’t we? you realize you’re out of olive oil at the very last second.
Fret not! you can easily substitute with vegetable oil , or even go for melted butter for a touch of richness.
If you want to get fancy, a whole wheat flour substitute can add loads of flavor and nutrition.
And for those keeping an eye on dietary needs, consider using honey instead of sugar . It sweetens your dough without that granulated kick. Yes, please!
Kitchen Equipment Essentials
Now, let’s chat about the tools of the trade. your oster breadmaker is your best friend here. but if you don’t have one, no worries! a mixing bowl and a good old loaf pan will do the trick.
I often grab my rubber spatula to clean the sides of my mixing bowl.
Storage solutions for your tools? Keep them organized. I’ve learned that a mess means a stressful cooking experience! So, keep that kitchen clean for some smooth sailing during your next baking adventure.
Final Thoughts Before We Bake
So, now you’re all geared up with essential ingredients, tools, and some game-changing substitutions. honestly, it’s this simple approach to ingredient knowledge that’s helped me create delicious artisan bread at home .
It brings joy, and who doesn’t want that?
Now, let’s roll up those sleeves! you’re ready for some practical action with the best breadmaking instructions for the perfect loaf.
Grab your oster bread machine , and let’s bake some delicious crusty homemade bread together!
Mastering the Art of Professional Cooking with Oster Breadmakers
Cooking is an adventure, isn’t it? whether you're a pro or just looking to whip up a cozy meal, having a solid method in the kitchen can make all the difference.
Today, i'm diving into professional cooking methods, with a special focus on my favorite kitchen buddy: the oster breadmaker . i mean, who doesn't want to bask in the aroma of fresh bread baking away while they kick back with a cup of coffee?
Essential Preparation Steps
First up, it's all about mise en place . this fancy french term just means getting your ingredients ready before you start cooking.
Measure out your 4 cups of all-purpose flour , 2 tablespoons of sugar , and 1 teaspoon of salt ; you’ll be ready to rock without frantically searching for something mid-recipe.
Pro tip: it’s like laying out your kit before a big game—no last-minute scrambles allowed!
Next is time management . if you’re using your oster bread machine , note that the total time from start to slicing is around 3 hours and 10 minutes ! allocate your time wisely, maybe knock out that 10 minutes of prep while surfing instagram.
Then, there’s organization . keep your workspace clean and clutter-free. trust me, no one wants to sift through a mess to find their bread knife .
And don’t forget about safety! always use oven mitts when handling hot pans. you don’t want to end up with a burn that’ll make you cringe every time you take out that delicious, crusty homemade bread .
Step-by-Step Process
Alright, let’s break this down! Here’s a quick, numbered guide because who doesn’t like a little checklist?
- Prepare the Breadmaker: Make sure your bread pan is clean and securely placed in the machine.
- Combine Wet Ingredients: Mix warm water (about 110° F/ 43° C ) and sugar, then sprinkle your active dry yeast on top. Let it foam for about 5 minutes . Patience is key here!
- Mix Dry Ingredients: In another bowl, combine your flour and salt.
- Dump It All In: Pour the yeast mix and 2 tablespoons of vegetable oil into the bread pan, followed by the flour mixture.
- Set It and Forget It: Choose your bread cycle and start the machine.
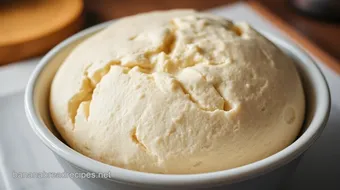
- Monitor the Kneading: Check in during the kneading phase to make sure the dough is forming properly. Adjust as needed (it should look like a soft ball, not soup).
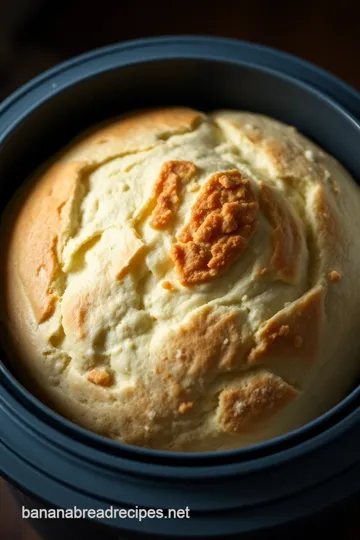
- Let It Bake: Once it’s in baking mode, sit back and relax. You'll be smelling that golden goodness in no time!
- Cool & Slice: Carefully take it out and let it cool before diving in.
Expert Techniques
Now for the expert stuff! when handling your dough ingredients , the key is to strike a balance. if it’s too sticky, add a little more flour.
Too dry? splash in some warm water—carefully, of course!
Another trick? Control your temperature . When you’re baking bread, internal temp should reach around 190° F to ensure it’s fully cooked. Use a food thermometer to avoid any surprises.
Success Strategies
Let’s wrap this up with some quick success strategies . avoid those common pitfalls like not measuring your flour. seriously, that’s a game-changer! keeping flour consistent can help you perfect your easy bread recipe every single time.
Also, don’t hesitate on make-ahead options . you can prep that dough in advance and pop it in the fridge overnight.
It’s a lifesaver during busy mornings when you want fresh bread without the fuss!
So there you have it! Whether you’re new to the scene or a seasoned pro, enjoying the benefits of homemade bread and mastering your Oster bread machine is totally doable.
Now that you've had a crash course, let’s get you some additional information to help you along the way! You're going to be the bread hero of your kitchen, and trust me, everyone’s going to want a slice!
Additional Recipe Information for Classic Homemade Bread with Oster Breadmaker
Pro Tips & Secrets
Oh my gosh, where do i even start? if you’re diving into breadmaker recipes using your oster bread machine , there are a few nuggets of wisdom that’ll make your bread-making journey smoother than butter on warm toast.
First, always use warm water —about 110° f ( 43° c) . not too hot, not too cold . just right! this is key for activating the active dry yeast like your very own goldilocks moment.
When it comes to flavor enhancement , don’t shy away from adding some pizzazz! a sprinkle of garlic powder or a bit of dried herbs can elevate your loaf to new levels.
Seriously, your taste buds will thank you!
And let’s talk time-saving techniques. monitor that kneading process! if you notice the dough isn’t forming a nice ball, adjust with a tablespoon of flour or water.
Trust me, it makes all the difference, leading to that perfect bread dough consistency you’re after.
Perfect Presentation
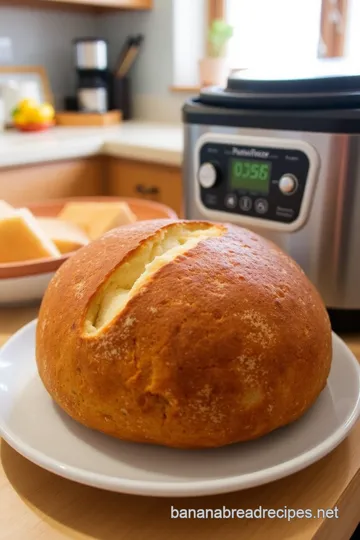
Now, onto the visual appeal! a great loaf deserves great presentation, right? once your delicious, crusty homemade bread is out of the oster breadmaker , let it cool a bit on a wire rack.
Then slice it up nice and neat!
For some killer plating techniques, consider arranging the slices in a fan shape on a rustic wooden board. throw in a bit of greenery—like fresh rosemary or basil—for color.
Garnish ideas are endless: think sunflower seeds scattered on top or a drizzle of honey for that sweet finish.
Color combinations matter a lot too. Pair your golden-brown bread with colorful sides, like ripe tomatoes or vibrant salads. It will not only taste good but also look stunning!
Storage & Make-Ahead
So, you’ve baked this amazeballs loaf, but what now? if you’re thinking ahead, here’s the lowdown on storage. allow your bread to cool completely before wrapping it in plastic wrap.
This keeps it soft longer!
Homemade bread can last about 3 to 5 days on the counter. if you want to extend its life, pop it in the freezer.
Just slice before freezing; this way, you can pull out pieces whenever the craving hits.
When it comes to reheating, the oven is your best friend. Just place those slices back in at 350° F ( 175° C) for about 10 minutes, and boom—fresh bread vibes!
Creative Variations
Want to mix things up? let’s explore those breadmaker variations ! substitute half of the all-purpose flour with whole wheat for a more rustic vibe.
Looking for a cheesy twist? toss in a cup of shredded cheese right before the bake cycle. extra flavor, no fuss!
Seasonally, you can really have fun! add pumpkin puree and warm spices in the fall, or negotiate with seasonal herbs in the spring.
Talk about flavor adaptations! the more you play around, the more your yeast bread recipes become uniquely yours.
Complete Nutrition Guide
Alright, so let’s get healthy! this classic bread isn’t just about taste; it’s about good vibes too. packed with about 3 grams of protein and fewer than 150 calories per slice, it’s great for those mindful of their diet.
Dietary considerations? substituting with whole wheat flour can give you that hearty texture, full of fiber! trust me, your body will love you for it.
Keep an eye on your portion sizes; those delicious slices can add up quickly.
Expert FAQ Solutions
I get it—questions pop up like popcorn! how do you know if your yeast is active? a little foamy action in warm water is your answer.
Troubleshooting? if your bread turns out too dense, most likely you need either more water or less flour next time.
Success tips? always measure your dough ingredients accurately. a simple scale goes a long way in making sure you nail that basic bread recipe every time.
Embrace it, and don’t be afraid to experiment!
Wrapping It Up
At the end of the day, cooking is all about having fun and finding what flavors resonate with your soul.
The oster breadmakers are here to make your life a whole lot easier. just dive in. if you stumble? don’t sweat it! each loaf gets you closer.
So grab that bread machine and roll up those sleeves! fresh bread baking isn’t just about the finished product; it’s about the smiles, the recipes shared, and the memories made.
Happy baking, my friends!
Classic Homemade Bread with Oster Breadmaker Card
⚖️ Ingredients:
- 4 cups (500g) all-purpose flour
- 1 ½ cups (360ml) warm water (about 110°F/43°C)
- 2 tablespoons (25g) granulated sugar
- 1 teaspoon (6g) salt
- 2 ¼ teaspoons (1 packet or 7g) active dry yeast
- 2 tablespoons (30ml) vegetable oil
🥄 Instructions:
- Step 1: Ensure the bread pan is clean and securely placed in the Oster breadmaker.
- Step 2: In a mixing bowl, combine warm water and sugar. Sprinkle the yeast over the water and let it sit for about 5 minutes until foamy.
- Step 3: In a separate bowl, whisk together the flour and salt.
- Step 4: Pour the yeast mixture and vegetable oil into the bread pan, then add the flour mixture on top.
- Step 5: Close the lid, select the appropriate bread cycle (e.g., Basic or White Bread), and start the machine.
- Step 6: Check during kneading to ensure the dough is forming a ball. Adjust with a tablespoon of flour or water as needed.
- Step 7: Wait until the cycle is complete, and the bread is golden brown.
- Step 8: Carefully remove the bread from the pan and let it cool on a wire rack before slicing.
Previous Recipe: How My Oikos Triple Zero Parfait Became a Healthy Family Favorite!
Next Recipe: How to Make Easy Homemade Wiper Fluid: My Go-To Recipe!