Heavenly Classic Apple Crisp with Oat Topping
Have you ever wanted to recreate that warm, cozy feeling of my grandmother's apple crisp? Bake Classic Apple Crisp with Oat Topping for a delicious treat that evokes nostalgia.

Have you ever taken a deep breath, closed your eyes, and let the smell of baked apples transport you back to your grandma’s kitchen? i can still picture her standing by the oven, lovingly stirring her classic apple crisp while we kids practically danced around waiting for dessert.
There’s just something magical about the combination of sweet and tart apples paired with that nutty oat topping , right? well, get ready to recreate that scene in your own home! today, i'm going to share my secrets on how to bake classic apple crisp with oat topping that’s just like grandma used to make, but even better (shh, don’t tell her!).
This recipe has roots that go all the way back to england, where the apple crumble first made a splash.
Over time, it has evolved into the beloved dessert we know today. fast forward to modern times, and you’ll find it’s a staple at holiday gatherings, family dinners, and even casual weekend cookouts.
Need a quick fix for your sweet tooth? this dessert is about as easy to whip up as it gets.
In less than an hour, you'll have something warm and cozy straight from the oven. trust me; it’s just that simple.
Cooking isn't expensive either. with top-notch ingredients like seasonal apples , some oats, and butter, you can make a batch that serves 6-8 for about $10! and with such friendly ingredients, it's more than just an affordable dessert—it's an experience to share with family and friends.
Recipe Overview
One of the best parts of this homemade apple crisp is how flexible it is. you can mix up tart apple varieties to get just the right flavor profile! granny smith apples bring a lovely tartness, while honeycrisps add just a touch of sweetness.
Not to mention, you can even throw in some blueberries or raspberries for a fun twist! so whether you’re in the mood for a plain old apple dish or something shaken up, this recipe has you covered.
Key Benefits
Now, let’s talk health—because this dessert isn’t just about indulgence. using fresh apples gives you vitamins and fiber, making it a wholesome dessert idea .
Plus, the oats? talk about a game changer! they have that lovely crunch while providing a wealth of nutrients. whether you’re looking for family-friendly recipes or something to impress guests, this dish is versatile enough for any occasion.
And hey, who wouldn’t want a cozy dish of warm fruit crisp in front of them after a long day?
Perfect for those crisp fall evenings, this dessert isn’t just a treat but a way to bring people together. you can totally handle it on your own, or get the family involved—it's a great bonding experience! if you’re looking for a quick apple dessert that screams comfort food, look no further.
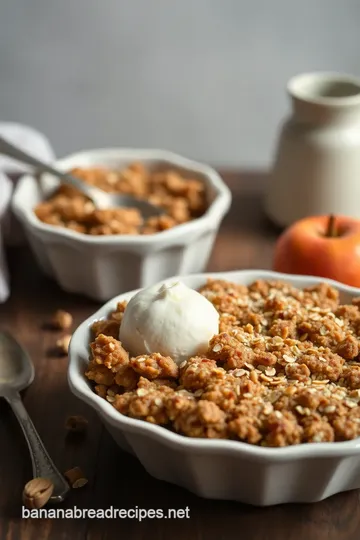
Plus, you can serve it just as it is or throw a scoop of vanilla ice cream on top for that heavenly clash of warm and cold.
It's simply sublime!
As we dive into the details, i can’t wait to show you what you’ll need to make this dish a reality.
So let’s get cracking and gather our ingredients for this delightful apple dessert with oats !
Essential Ingredients Guide: Elevate Your Baking Game
Hey there, fellow food lovers! if you're diving into the wonderful world of baking , you’ve probably heard of the classic apple crisp .
It’s one of those desserts that just screams comfort. so, let’s embark on this journey together to explore the essential ingredients that will bring your bake classic apple crisp with oat topping to life.
Trust me, we’re gonna make this easy-peasy!
Premium Core Components
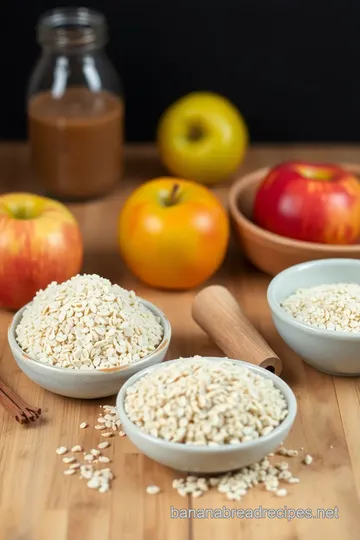
First things first, let’s chat about those premium ingredients you’ll need. when you're picking apples, go for tart varieties like granny smith or honeycrisp.
You want that perfect balance of sweet and tart in your dessert, right?
For your filling, you’re looking at about 6 cups of tart apples , that’s roughly 6-8 medium apples . slice ‘em up! toss in 1/2 cup of granulated sugar (that’s 100g ), 2 tablespoons of flour ( 16g ), a splash of lemon juice ( 1 tablespoon or 15ml ), and a sprinkle of spices like cinnamon and nutmeg .
All these ingredients blend together to create the warm heart of your dish.
Quality Indicators and Storage Tips
Now, how do you know if your apples are fresh? go for firm, unblemished apples with a nice shine! once you get them, store them in a cool, dry place.
Honestly, i always try to use them within a week for the best flavor. remember, the fresher your ingredients, the better your homemade apple crisp!
Signature Seasoning Blend
Your apple filling needs some love. so, let’s talk spices! for that signature warmth, you’ll want a combo of ground cinnamon and a pinch of nutmeg .
But don’t stop there — consider adding a bit of allspice or even some fresh ginger for a kick. and if you're feeling adventurous, toss in a handful of berries for a delicious twist on your classic apple crumble!
Smart Substitutions
Life get busy, right? sometimes you need a quick apple dessert , and that’s where substitutions come in handy. if you’re out of granulated sugar , you can easily replace it with brown sugar for a richer flavor.
Got some dietary restrictions? swap regular oats with gluten-free oats . and if you’re dairy-free, coconut oil or margarine can do the trick just fine!
Kitchen Equipment Essentials
Alright, let’s make sure you’re set up for success. you’ll need basic tools like a 9x13-inch baking dish , a few mixing bowls, and of course, a trusty knife to slice those apples.
If you’ve got a whisk, great! but a fork works too.
Also, don’t forget to line your baking dish with a bit of cooking spray or grease it lightly. It’ll help with cleanup later, and who doesn’t appreciate that?
A Wholesome Recipe Awaits
By now, you have the scoop on making that classic apple dessert with oats and tips to make it shine.
Remember, baking doesn't have to be super complicated. you just need a little patience and some love for the ingredients.
So, ready to roll up your sleeves and start baking? grab those ingredients, and let’s get to the good stuff! soon, you’ll know exactly how to bake apple crisp like a pro.
Not to mention, your kitchen will smell absolutely heavenly as that warm fruit crisp bakes to golden perfection.
Can’t wait to dive into the step-by-step instructions next! Trust me, you don’t want to miss this. 🍏
The Art of Professional Cooking: Mastering the Classics
Alright, my fellow food lovers! let’s dive into the wonderful world of professional cooking methods, particularly as we tackle a delicious venture: how to bake classic apple crisp with oat topping .
Trust me, this is one recipe that'll make you feel like a superstar in the kitchen!
Essential Preparation Steps
First things first. if you want to seriously rock this apple crisp game, you need to nail the mise en place .
This fancy french term just means having everything ready before you start cooking. think of it as laying out all your ingredients: pleasingly peeled and sliced apples , spices , and your oats .
It saves you from running around mid-recipe looking for that darn cinnamon jar!
Next up, let’s talk about time management . Set a timer while baking to keep track of those critical 35- 40 minutes —yes, you definitely don't want to end up with a sad, burnt topping!
And don’t forget to organize your workspace. Keep it clutter-free. It’ll not only help you focus but also prevent those oopsies —like spilling the flour everywhere.
Oh, and safety first, folks! Keep those knives sharp and watch your fingers when slicing those sweet and tart apples . It’s all too easy to get lost in thought while chopping.
Step-by-Step Process
Now, let’s slice this baby up into clear, simple steps:
- Preheat your oven to 350° F ( 175° C) . This is like the golden ticket to a perfectly baked dessert.
- For the filling, grab your apples—about 6 cups worth. Combine them with ½ cup sugar , a tad of lemon juice, and spices. Toss well, making sure our beloved apples are happy and coated.
- Spread that glorious mixture into a 9x13-inch baking dish . Think of yourself as an artist at work—those apples deserve their time in the spotlight!
- Next, let’s whip up the oat topping. Mix 1 cup rolled oats , 1 cup flour , ½ cup brown sugar , and a pinch of salt. Pour in that melted butter and mix until crumbly, resembling sandy beach vibes!
- Sprinkle this mix generously over the apples. Timing precision is crucial—don’t rush it; make it look good!
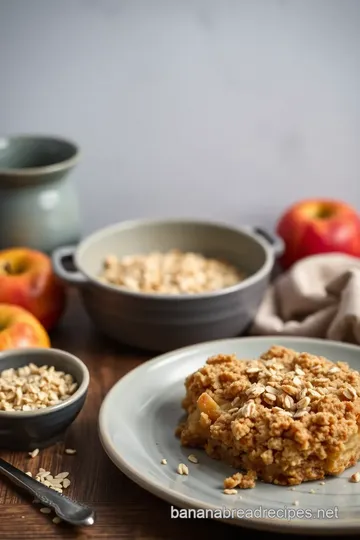
- Bake for 35- 40 minutes or until golden brown . Keep an eye on that crisp; you want it looking divine!
Visual cues for doneness ? Look for a bubbly filling and golden edges. That’s when you know you’ve struck dessert gold!
Expert Techniques
Here’s where I want to drop some gems. Follow these critical steps for that pro-touch:
- Don’t be shy with your apples! A mix of tart and sweet varieties gives depth—grab Granny Smith and Honeycrisp for the best flavor play.
- Always check your topping . If it looks too brown, you can cover it with foil to avoid burning while the apples finish cooking.
- Troubleshooting tips ? If your crisp is soggy, consider reducing some of the liquid from the apples next time or cook a bit longer. Balancing is key!
Success Strategies
We all mess up sometimes. Common mistakes to avoid include not using enough apples or overloading on sugar. Trust me, you want a solid balance to achieve that homemade apple crisp magic!
Quality assurance tips ? Taste it straight from the oven (careful, it’s hot)—the flavors should sing!
And hey, make-ahead options are a real lifesaver. assemble your crisp the night before, let it chill in the fridge, then pop it in the oven for that fresh-baked aroma to fill your kitchen.
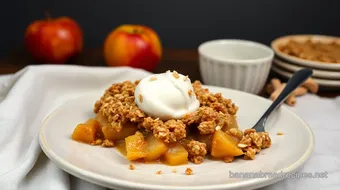
Honestly, nothing beats serving this classic apple crumble warm, perhaps with a scoop of vanilla ice cream. Now that’s comfort food at its best!
Additional Information
As we wrap this up, let’s celebrate the joy of baking for beginners and anyone who simply loves a wholesome dessert .
Whether you serve it at family gatherings or cozy nights in, this easy apple dessert shines bright as a fall staple.
So, next time you’re craving something nostalgic yet comforting, remember how to bake classic apple crisp with oat topping . It’s simple, fun, and a surefire way to impress your crowd! Happy baking!
Unlocking the Secrets to an Irresistible Apple Crisp
You’ve decided to bake a classic apple crisp with oat topping. can i just say, you’re about to create a dessert that screams comfort on a plate! but before you dive into those sweet and tart apples , let’s uncover some pro tips and secrets to make your dessert an absolute hit.
Pro Tips & Secrets
Chef’s insights: when i first started baking, i often thought more ingredients meant better flavor. well, let me tell you, simplicity works wonders! stick with those tart apple varieties .
Trust me, they balance perfectly with that sweet oat topping. use a mix, like granny smith and honeycrisp, for a flavor explosion that’s off the charts.
Time-saving techniques: here’s a little hack: combine your filling ingredients the night before. cut your apples, toss them with the sugar and spices, and let them sit in the fridge overnight.
This lets those flavors mingle beautifully! come bake time, you’ll only need to throw the apples in a dish, whip up that oat topping, and you’re golden.
Flavor Enhancement: A splash of lemon juice does wonders for your apple crisp. It not only brightens flavors but also helps keep your apples from browning quickly. Don’t skip it!
Presentation advice: once it’s baked, let it cool a few minutes. then scoop it into bowls, topping with vanilla ice cream .
It adds a luxe touch and the contrasting temperature is out of this world!
Perfect Presentation
Let’s talk plating techniques . You don’t need to be a Picasso in the kitchen. A simple scoop of that warm, gooey apple crisp drizzled with a bit of caramel sauce and a sprinkle of cinnamon will have your guests ooh-ing and aah-ing!
Garnish Ideas: A sprig of mint or a light dusting of powdered sugar makes your dish look like it’s straight out of a magazine. It’s all about those little details, right?
Color Combinations: The golden brown topping against the soft, cinnamon-spiced apple filling creates such an inviting look. You know what they say, we eat with our eyes first!
Storage & Make-Ahead
Now, onto practical stuff! if you end up with leftovers (totally unlikely, but who knows?), you can store it in an airtight container in the fridge for up to 3 days .
Just reheat it in the oven—about 10 minutes at 350° f works wonders.
Freshness duration: i find the oat topping remains crunchy for about two days in the fridge. but... if you want it to last longer, consider freezing individual portions.
Just pop it in the microwave when you need a quick, cozy dessert!
Creative Variations
Feeling adventurous? Here are some flavor adaptations I love to play around with. You can mix in berries for a fruity twist. Blueberries and raspberries are surprisingly delightful with apple!
If you’re looking for dietary modifications , trying out gluten-free oats can accommodate your gluten-sensitive friends. Easy peasy.
Or how about a seasonal twist? Add some chopped pecans or even a splash of bourbon to your oat topping for that holiday vibe.
Complete Nutrition Guide
So, you’re here for the deliciousness, but let’s chat numbers! this apple crisp recipe packs in some decent fiber thanks to the oats and apples.
It’s indulgent but has a lot to offer in the nutritional department.
One serving gives you about 250 calories and can be a great treat when you’re craving some comfort. Pair it with your favorite cup of joe and you’ll be on cloud nine.
Expert FAQ Solutions
You might wonder, “What if my topping isn't crunchy?” No worries! Crank your oven up a notch. A little more heat for the last few minutes really crisps things up.
And if you don’t have rolled oats ? Not a problem. You can blend them down to make a flour-like consistency for a different take on the topping.
Conclusion: Embrace the Warmth!
At the end of the day, baking a classic apple crisp with oat topping isn’t just about following a recipe; it’s about creating memories in the kitchen.
Whether you’re making it for your family or just to indulge yourself, this simple recipe is all about comfort and joy.
So grab your tart apples and start baking this easy apple dessert that will warm your heart.
Now, go on! Get into that kitchen and whip up this homemade apple crisp . I promise every bite will feel like a warm hug. Happy baking!
Heavenly Classic Apple Crisp with Oat Topping Card
⚖️ Ingredients:
- 6 cups of tart apples, peeled and sliced (approximately 1,200g)
- 1/2 cup granulated sugar (100g)
- 2 tablespoons all-purpose flour (16g)
- 1 tablespoon lemon juice (15ml)
- 1 teaspoon ground cinnamon (2g)
- 1/2 teaspoon ground nutmeg (1g)
- Pinch of salt
- 1 cup rolled oats (90g)
- 1 cup all-purpose flour (120g)
- 1/2 cup brown sugar, packed (100g)
- 1/2 teaspoon ground cinnamon (1g)
- 1/4 teaspoon salt
- 1/2 cup unsalted butter, melted (113g)
🥄 Instructions:
- Step 1: Preheat your oven to 350°F (175°C).
- Step 2: Peel and slice the apples into thin wedges.
- Step 3: In a mixing bowl, combine apples, granulated sugar, flour, lemon juice, cinnamon, nutmeg, and salt. Toss to coat.
- Step 4: Spread the apple mixture evenly into a 9x13-inch baking dish.
- Step 5: In a separate bowl, combine rolled oats, flour, brown sugar, cinnamon, and salt.
- Step 6: Pour in melted butter and mix until crumbly.
- Step 7: Evenly distribute the oat mixture over the apples.
- Step 8: Place in the preheated oven and bake for 35-40 minutes or until the apples are tender and the topping is golden brown.
- Step 9: Let cool for a few minutes before serving.
Previous Recipe: How to Bake Fluffy Biscuits | Quick & Easy Recipe for Warm Mornings
Next Recipe: How to Bake Chocolate Babka with Rich Filling: My Grandmother's Secret