No-Knead Dutch Oven Bread in 18 Hours
Want to make amazing bread? My easy Dutch Oven Bread recipe takes just 18 hours to rise, delivering a crusty loaf that's perfect for any occasion!

- The Joy of Baking: A Love for Dutch Oven Bread
- A Little Bread History
- The Nitty-Gritty: Time and Costs
- Why You’ll Love It
- Unique Advantages
- Ready to Bake?
- Essential Ingredients for Baking Bread
- Mastering the Art of Professional Cooking: A Guide for Home Chefs
- Additional Recipe Information: Bake Easy Dutch Oven Bread in 18 Hours
- Recipe Card
The Joy of Baking: A Love for Dutch Oven Bread
Have you ever had the wafting aroma of freshly baked bread fill your home and put a smile on your face? honestly, there’s just something magical about it.
One chilly sunday morning, the joy of baking hit me like a whirlwind. i wanted to try something new—something that wouldn’t have me kneading dough for hours.
Enter the chance to bake easy dutch oven bread in 18 hours . yep, you read that right, and trust me, it’s a total game-changer.
A Little Bread History
Bread has been a staple for centuries, but this no-knead bread recipe comes with roots planted firmly in modern artisan baking.
Introduced by jim lahey in the early 2000s, this method sparked a frenzy among home bakers looking for simple yet impressive results.
Now, it’s become a kitchen essential for many, and it’s easy to see why. this easy bread recipe delivers that crusty, golden loaf that makes the heart of any sandwich lover skip a beat!
You can expect minimal active time in the kitchen. seriously, you’re looking at just 15 minutes of prep time , plus nearly 18 hours of resting .
It’s one of those turkey-in-the-oven scenarios where “fast” and “easy” meet patience.
The Nitty-Gritty: Time and Costs
Now let’s chat practicalities—this recipe requires a bit of foresight due to the long rise. the end result? a chewy bread texture that’s practically begging for a visit from your favorite spreads or dips.
And it’s wallet-friendly too! with basic ingredients like flour, salt, yeast, and warm water, you can whip up this masterpiece without breaking the bank.
This single loaf provides around 8 servings , perfect for breakfast, lunch, or a cozy dinner with friends.
Why You’ll Love It
First things first, let’s talk health. while this isn’t a kale smoothie, homemade bread typically has fewer preservatives than store-bought options.
You get to control what goes into it, not to mention the satisfaction of knowing you made it from scratch! the long rise bread dough method builds flavor, resulting in a nutty taste packed into that crusty bread loaf .
Thinking about when to bake it? picture this: a chilly evening where the whole family gathers around a big pot of chili.
That’s the kind of special occasion this bread is made for. also, it goes perfectly with a robust soup or is just amazing alongside a glass of wine—your new go-to for cozy nights in!
Unique Advantages
What sets this recipe apart? no kneading means you can chat, binge-watch your favorite show, or squeeze in a quick workout while waiting for your bread to rise.
Plus, the skill level is perfect for beginners—literally anyone can become a bread hero with this step-by-step bread recipe .
Now, I could go on about bread baking essentials , but I think you get the point. It's simple, rewarding, and gives you a loaf that screams “I've got my life together!”
Ready to Bake?
If you’re as excited as i am about baking this method, let’s dive into the ingredients you’ll need to recreate this tasty masterpiece! keep that dutch oven dusted off because you’re about to turn that simple dough into a homemade crusty loaf that’ll be the star of any meal.
Buckle up for deliciousness!
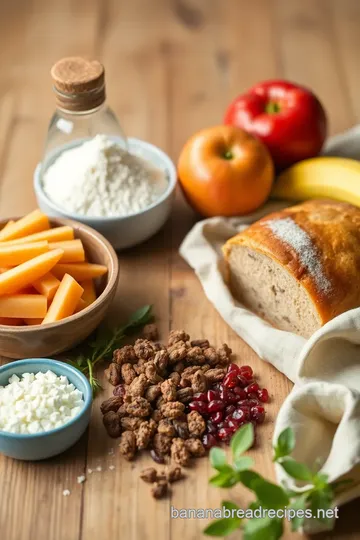
Essential Ingredients for Baking Bread
Oh my gosh, getting the right ingredients is like the first step to heaven when it comes to bread making! you wanna nail that crusty bread loaf with a chewy bread texture , right? let’s dive into the must-haves that’ll make your baking journey smooth as softened butter.
Premium Core Components
When it comes to baking, quality matters! Here’s the rundown.
-
Flour: All-purpose is your best friend here. For a fluffy texture, I recommend 3 cups (360g). If you're feeling adventurous, try 1 cup of whole wheat for depth!
-
Salt: Don’t skimp on this! 1 ½ teaspoons (9g). It truly enhances flavor.
-
Yeast: I use ½ teaspoon (1.5g) of instant yeast. Pro tip: always check the expiration date. Freshness = bubbliness!
-
Water: Use 1 ½ cups warm water (360ml). You want it cozy, not hot. This helps wake up your yeast!
Remember, the shelf life of flour is generally about 6 to 8 months. keep it airtight and cool for the best results.
If you want to know if the yeast is bubbling, just give it a sniff—if it smells yeasty and sort of sweet, you're good to go!
Signature Seasoning Blend
Now onto the fun part: seasoning! Bread doesn’t have to be bland. You can jazz it up!
-
Spices: Think garlic powder or dried rosemary . Just a teaspoon can add a lovely twist.
-
Herbs: Fresh basil or thyme pairs like a dream, mixing beautifully with your bread.
-
Flavor enhancers: A sprinkle of sugar can help with browning.
-
Regional twists: If you’re feeling adventurous, throw in some Italian seasoning for a Mediterranean flair. Bread can become a whole culinary experience!
Smart Substitutions
Life happens, and honestly, sometimes you run out of ingredients. No worries, I’ve been there!
-
Flour: Don’t have all-purpose? No biggie—use bread flour or even gluten-free flour blends if you're feeling fancy!
-
Yeast options: If you find yourself with no instant yeast, you can use active dry yeast but let it bloom in warm water first!
-
Water replacements: In a pinch, non-dairy milk, like almond or oat, can add a twist.
-
Seasonal goodies: During autumn, consider adding pumpkin puree for a seasonal treat!
Kitchen Equipment Essentials
Baking bread should be enjoyable, so let’s keep it simple! Start with these must-haves:
-
Dutch Oven: A 5 to 7-quart pot is perfect for creating that beautiful steam needed for a golden crust. Seriously, cooking with a Dutch oven is a lifesaver!
-
Mixing Bowl: You’ll need a large one for all that dough action.
-
Plastic Wrap: Cover your dough to keep it moist while it rises.
-
Parchment Paper: Makes moving your dough easier and less messy.
I remember the first time I tried Dutch oven recipes —the crust was so perfect, I couldn’t believe I made it!
Wrapping It Up
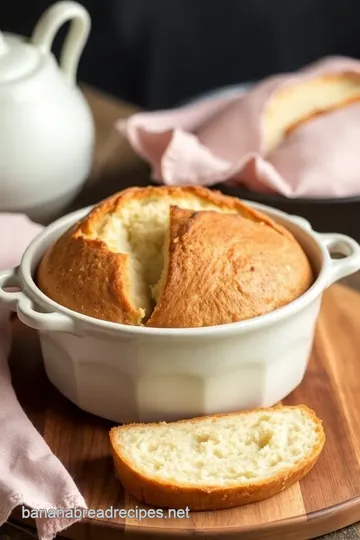
So, whether you're tackling a no-knead bread recipe or trying your hand at an easy homemade bread , these guidelines are your golden ticket! just think about it: in just 18 hours , you can bake easy dutch oven bread in 18 hours .
Imagine that fluffy goodness right out of your oven, just calling for a pat of butter!
Now that you're armed with these essentials, you're ready to jump into baking. let’s move on to the good stuff—the step-by-step instructions that’ll have you whipping up that delicious bread, one loaf at a time.
Happy baking, friend!
Mastering the Art of Professional Cooking: A Guide for Home Chefs
There’s something about cooking that feels both thrilling and intimidating. you know what i mean? whipping up dishes at home can sometimes feel like rocket science, especially when you see those michelin stars dancing in your head.
But fret not, my friend! i’m here to break it all down and help you bake easy dutch oven bread in 18 hours like a pro.
Let’s kick things off with some essential professional cooking methods.
Essential Preparation Steps
First things first, mise en place – fancy french for “everything in its place.” this means gather all your ingredients and tools before diving in.
It’s like laying the groundwork for a smooth ride! measure out that flour, salt, and yeast because trust me, you want to avoid scrambling around mid-bake like some headless chicken.
Now, let’s chat time management. as any professional chef will tell you, knowing what to do and when is key.
Baking this easy bread recipe requires some wait time. you’ll have the dough resting for 12- 18 hours .
So while you’re waiting, do laundry or catch up on your favorite show.
Getting organized takes the cake—or bread in this case! have a clean workstation and all necessary tools ready. keep a towel handy for quick clean-up or for covering your dough during the rising process.
And don’t forget about safety! always be cautious with hot surfaces and keep sharp knives away from the edge of the counter.
Step-by-Step Process
Ready for the nitty-gritty? Let’s break it down into simple, numbered steps:
-
Combine the Dry Ingredients: In a bowl, whisk together 3 cups of flour , 1 ½ teaspoons of salt , and ½ teaspoon of instant yeast .
-
Add Warm Water: Pour in 1 ½ cups of warm water and stir until a sticky dough forms.
-
Cover and rest: cover the bowl with plastic wrap. let that dough deal with the magic of fermentation for 12- 18 hours .
The surface should get bubbly—this is a good sign!
-
Shape Your Loaf: Flour your surface, and gently fold the dough a couple of times. Shape it into a round.
-
Second Rise: Let it puff up a bit more on a piece of parchment paper for about 1- 2 hours .
-
Preheat Your Dutch Oven: About 30 minutes before you bake, toss your empty Dutch oven in the oven and crank up that heat to 450° F .
-
Bake the Loaf: Once hot, sprinkle some cornmeal in the bottom and drop your loaf in. Cover it up and bake for 30 minutes .
-
Brown the Crust: Remove the lid and bake an additional 15- 20 minutes until it’s golden brown. Your internal temperature should hit about 205° F .
-
Cool Down: Transfer the loaf to a wire rack. Resist the urge to slice it right away—wait for it to cool completely for the best texture!
Expert Techniques
Here’s where you bring out your inner chef extraordinaire! the trick to a crusty bread loaf is the steam that builds inside that dutch oven, creating a chewy texture that’s just to die for.
Check that you’re not skipping on preheating – it makes a world of difference.
Now, quality checkpoints: always touch the dough. if it feels too wet, work in a bit more flour, but ensure you don’t overdo it.
And what if things go wrong? don’t sweat it too much! oven temperatures can vary, so if it’s not browning, give it a few more minutes and keep a watchful eye.
Success Strategies
Common mistakes? forgetting to let the dough rest long enough can totally derail your efforts. trust the process—those long rises develop flavor that’ll leave your friends guessing if you bought that fantastic loaf from an artisan bakery.
Quality assurance is crucial. If your bread looks pale or feels too dense, you've gotta tweak your game next time.
And if you want to get ahead, do remember you can always make this dough the night before and leave it to rise in the fridge.
This is your overnight bread recipe win!
Getting Ready for More
Okay, we’ve covered a lot! But remember, baking is all about experimenting and enjoying the process. Each loaf you bake teaches you something new, so don’t fear the dough.
Now that you’re armed with these professional cooking methods , you can dive into more dutch oven recipes or even explore homemade crusty loaf options.
Embrace the challenge, and you’ll be a master baker in no time!
Stay tuned for more tips on enhancing your baking game. Next up, we’ll be diving deeper into Additional Information that’ll help you take your bread-making journey even further. Happy baking, friends!
Additional Recipe Information: Bake Easy Dutch Oven Bread in 18 Hours
Welcome, bread lovers! today, we’re diving into the world of no-knead dutch oven bread . this isn’t just your average loaf; we’re talking about a crusty masterpiece that practically bakes itself! buckle up because i’m about to spill the beans on some pro tips, perfect presentation methods, storage secrets, and so much more to make your baking journey a total breeze.
Pro Tips & Secrets
Let’s kick things off with a few insider tips that i wish i knew earlier. first off, when you’re measuring flour, don’t just scoop it straight from the bag! instead, spoon it into your measuring cup, then level it off.
It makes a huge difference for consistent baking.
Got a busy schedule? i hear ya! use these time-saving techniques : mix your dough right before bed and let it sit overnight.
You’ll wake up to a bubbly dough ready for the oven! speaking of bubbles, they are your friend! a long rise means a high-hydration dough that will lead to that chewy bread texture we all crave.
Now, for that added flavor boost—give your dough some TLC during its rise. Try adding herbs or spices for a knock-your-socks-off taste. Ever tried rosemary or garlic? Amazing.
And let’s talk presentation . Plating is everything, y’all! Serve that loaf on a wooden board. Add a little olive oil for dipping, and voilà! You’ve got an Insta-worthy spread.
Perfect Presentation
When it comes to serving your golden crust bread , you want it to shine. here are some fun plating techniques : slice your bread on a diagonal for that artisanal vibe.
Ever seen those bread baskets in fancy restaurants? yeah, recreate that at home!
For garnishing ideas , sprinkle some fresh herbs or even a little sea salt on top of your loaf right before you serve it.
It elevates everything! plus, colorful bread is just more fun, right? think vibrant spreads like roasted red pepper or even avocado for a stunning contrast.
Storage & Make-Ahead
Thinking of making this bread ahead of time? great choice! storage guidelines for your delicious creation: let it cool completely and then wrap it tightly in plastic wrap or store it in a bread bag.
That way, it stays fresh.
If you want to preserve that freshness even longer, you can slice it and freeze individual pieces. When you’re ready to dig in, just pop those slices in the toaster. Yum!
Most homemade loaves last about 3-5 days at room temperature. But trust me—the sooner, the better. Nothing beats fresh bread!
Creative Variations
Your bread-making techniques don’t have to stop at the basic recipe. Get creative! Here are some fun flavor adaptations :
- Seasonal Twists : Think pumpkin for the fall or cranberries during the holidays.
- Dietary Modifications : Replace some all-purpose flour with whole wheat for a heartier loaf.
- Regional Variations : Ever tried using some local beer in your dough? It’s a game changer!
Complete Nutrition Guide
Now, let’s not forget about health! This bread is not just tasty; it has benefits too. Here’s a quick breakdown:
- Calories : Approximately 120 per slice.
- Protein : 4g, which is pretty decent for a simple yeast bread .
- Dietary Considerations : Perfect alongside soups or salads. Think of it like the sidekick to your superhero meal!
Expert FAQ Solutions
Got questions? I’ve got answers! One of the most common questions I get is about dough stickiness. If it’s too sticky, sprinkle a bit more flour during shaping.
Another issue: the crust isn’t browning as expected. No worries, just make sure your Dutch Oven is preheated and don’t skip that second bake without the lid—it’s crucial for that crispy finish!
Conclusion
So there you have it! from the best bread for sandwiches to how to bake easy dutch oven bread in 18 hours , you’re equipped to impress everyone at your next brunch or dinner party.
Remember, baking should be fun! don’t stress about getting it “perfect.” each loaf is a delicious learning experience.
Now, what are you waiting for? Grab those ingredients and start your baking adventure! You’ll be an artisan bread baker in no time! Happy baking, friends!

No-Knead Dutch Oven Bread in 18 Hours Card

⚖️ Ingredients:
- 3 cups all-purpose flour (360g)
- 1 1/2 teaspoons salt (9g)
- 1/2 teaspoon instant yeast (1.5g)
- 1 1/2 cups warm water (360ml)
- Coarse cornmeal or flour for dusting
🥄 Instructions:
- Step 1: In a mixing bowl, whisk together flour, salt, and instant yeast until well blended.
- Step 2: Pour in warm water and stir until a shaggy dough forms.
- Step 3: Cover the bowl with plastic wrap or a clean towel. Let the dough rest at room temperature for 12-18 hours until doubled in size with bubbles.
- Step 4: Sprinkle a clean surface with flour. Turn the dough out and sprinkle with flour on top, gently fold over itself 2-3 times to shape into a round loaf.
- Step 5: Place the loaf on parchment paper. Cover with a towel and let it rise for about 1-2 hours until puffed up.
- Step 6: About 30 minutes before baking, place the empty Dutch oven (with lid) into the oven and preheat to 450°F (230°C).
- Step 7: Carefully remove the hot Dutch oven from the oven. Sprinkle the bottom with cornmeal or flour.
- Step 8: Lift the dough with parchment paper and place it into the Dutch oven. Cover with the lid and bake for 30 minutes.
- Step 9: Remove the lid and bake for an additional 15-20 minutes until the crust is a deep golden brown and internal temperature reaches 205°F (96°C).
- Step 10: Transfer the loaf to a wire rack and let it cool completely before slicing.
Previous Recipe: How to Bake Maple Pecan Rolls with Glaze: A Delicious Sunday Morning Treat
Next Recipe: How to Bake Chocolate Brownies with Ganache Topping: A Delicious Treat!