No-Knead Artisan Bread: Simple & Delicious
Craving homemade bread? Discover my game-changing No-Knead Artisan Bread: Simple & Delicious recipe that’s crispy, chewy, and oh-so-easy to make!

- Discovering the Joy of No-Knead Artisan Bread: Simple & Delicious
- A Slice of History
- The Modern Bread Renaissance
- The Nutritional Upside
- Why You’ll Love It
- Essential Ingredients Guide to Baking Your Own No-Knead Artisan Bread
- Perfecting the Art of No-Knead Artisan Bread: Simple & Delicious
- Pro Tips & Secrets for No-Knead Artisan Bread
- Perfect Presentation: Make Your Bread Shine
- Storage & Make-Ahead: Keep it Fresh
- Creative Variations: Spice It Up!
- Complete Nutrition Guide: Bread That’s Good for You
- Expert FAQ Solutions
- Recipe Card
Discovering the Joy of No-Knead Artisan Bread: Simple & Delicious
Have you ever walked into a bakery, inhaled that fresh-baked aroma, and thought, “wow, i wish i could do that at home”? oh my gosh, i totally get you! i remember the first time i attempted to make bread.
I was super excited but terrified at the same time. i mean, bread baking can seem like high-level wizardry, right? but guess what? it really doesn’t have to be! enter no-knead artisan bread: simple & delicious —this recipe is like having a culinary magic wand.
A Slice of History
So, let's chat about this little gem of a recipe. this no-knead bread recipe has roots in the rustic baking traditions of european kitchens, where less fuss meant more time for people.
It gained major popularity in the states thanks to jim lahey, who made it accessible to the everyday baker. it's now a staple for those of us who want crunchy crispy crust bread without spending our days kneading dough.
The process may seem lengthy, but most of that is passive time. trust me; it's just waiting for the dough to rise and do its thing!
The Modern Bread Renaissance
Fast forward to today, and this bread is blowing up on social media! everyone’s sharing their loaves, and honestly, who can blame them? with more folks baking at home than ever, the easy bread recipe has become a must-try for both beginners and experienced bakers alike.
A little bit of prep (like 15 minutes tops) and some tlc turns into deliciousness that’ll make you want to skip store-bought bread forever.
Plus, you’re looking at a total time commitment of about 13- 19 hours. sounds wild, but that's mostly the long-rise bread method doing its work!
Now, let’s talk dollars and cents: this loaf won't break the bank. with ingredients that most of us already have at home, you’re practically making artisan bread at home for next to nothing.
Depending on where you buy, you might get a whole loaf for around $1! plus, this recipe yields about 8-10 servings, making it perfect for family dinners or lunch prepping through the week.
The Nutritional Upside
But wait, there’s more! apart from the feel-good factors, this bread boasts some health benefits too. with its perfect chewy bread texture and fresh baked bread recipe , it's filled with complex flavors that develop during the slow fermentation process, making it surprisingly good for your gut.
Yep, that fermentation helps bring out the fermented bread health benefits , which is great news!
Serving up this bread can elevate any meal. it’s fantastic for special occasions , like a cozy dinner party, or even just a quiet weekend brunch with your closest pals.
Whether you dunk it in some olive oil or enjoy it plain, this bread just feels right for any setting.
And let’s be real, nothing says “i care” quite like homemade bread.
Why You’ll Love It
Here’s a quick rundown of what makes this bread a real winner. you get a minimal kneading bread without needing extra tools (hello, everyday baking tools!).
It pairs beautifully with soups, stews, and all those tasty dips everyone loves. the flavor is a delightful dance of sourdough notes—no need for a sourdough starter here, just the beauty of time and patience!
So, are you excited yet? Ready to roll up those sleeves and bake up something fabulous? You can do this! And as we dive into the nitty-gritty, let’s check out the ingredients you’ll need to get started on your bread adventure!

Essential Ingredients Guide to Baking Your Own No-Knead Artisan Bread
Baking bread at home is one of those delightful experiences that can transform your kitchen into a cozy haven. you know the smell, right? it’s like the warm embrace of fresh-baked bread! and if you’re thinking about diving into the world of no-knead artisan bread: simple & delicious , then you’re gonna want to familiarize yourself with the essential ingredients and tools.
Let's break it down together, shall we?
Premium Core Components
To kick things off, let’s talk about premium ingredients . The base for your bread is super important. Here’s what you need:
- 3 cups (360g) all-purpose flour : This is your main star. For the best chewy bread texture , you may want to consider using bread flour instead, which has a higher protein content. It’s all about that wonderful chewy crumb !
- 1½ teaspoons (9g) sea salt : This isn’t just for flavor; salt plays a key role in the fermentation process that gives bread its character.
- ½ teaspoon (2g) instant yeast : Easy-peasy! Instant yeast works like a charm and doesn’t need proofing beforehand.
- 1½ cups (360ml) warm water : Ideal temperature is around 100° F ( 38° C) . Too hot, and you’ll kill yeast; too cold, and you won’t wake it!
Quality indicators ? look for flour that’s finely milled and bright in color. keep the salt free from clumps by storing it in a cool, dry place.
Oh, and always check your yeast’s expiration date; old yeast is a no-go!
As for storage , flour should be kept in an airtight container to avoid moisture. the shelf life of all-purpose flour is about 6-12 months if stored properly.
If you wanna keep that fresh taste for longer, pop it in the fridge!
Signature Seasoning Blend
Okay, now let’s add some pizazz! Your basic bread can shine with the right seasoning blend . The simplest way is to play with herbs and spices .
Consider adding:
- Dried rosemary or thyme for a touch of earthiness.
- If you’re into a Mediterranean vibe, sprinkle in some oregano or garlic powder .
And hey, if you’re feeling adventurous, throw in some cheese or nuts during the mix. Trust me, this makes for a flavorful bread variation that’s to die for!
Smart Substitutions
Life happens, and sometimes you just don’t have what you need. But fear not! Here are some smart substitutions .
- Flour : Don't have all-purpose? Use whole wheat flour for a heartier loaf. Just note it might be denser.
- Salt : Table salt can step in for sea salt; same measurement will do.
- Yeast : No instant yeast? You can use active dry yeast—just let it dissolve in the warm water for a few minutes first.
And if you find yourself in a pinch without herbs for that rustic bread recipe , just skip them! Your bread will still be delicious.
Kitchen Equipment Essentials
To get baking, you don't need fancy gadgets, but a few must-have tools will make your life easier.
- Large mixing bowl : Takes care of your dough easily.
- Dutch oven : This is crucial for creating that crispy crust bread . If you don’t have one, any heavy pot with a lid will work.
- Wooden spoon or spatula : Just for mixing, nothing fancy here.
- Plastic wrap or kitchen towel : For covering that dough while it rises.
Got alternative options? Sure! A baking sheet can handle a loaf too, just be aware that it won’t trap steam like a Dutch oven.
Wrapping It Up
Now that you’ve got a grip on the essentials, we’re about to embark on an exciting journey of simple bread baking .
You’ll be kneading (or not, since this is minimal kneading bread ) in no time! with that irresistible sourdough flavor bread aroma wafting through your home, everyone will be clamoring at your door for a slice.
So, grab your ingredients and hang tight—we’re about to dive into the step-by-step instructions that will have you serving up homemade artisan bread like you’ve been doing it for years.
Just imagining that first slice with butter makes my mouth water! let's get baking!
Perfecting the Art of No-Knead Artisan Bread: Simple & Delicious
Baking bread at home? honestly, it sounds intimidating, but it doesn’t have to be! i was nervous the first time i attempted it.
But let me tell ya, with a no-knead bread recipe , the process is simple, and the results? well, they’re pure magic.
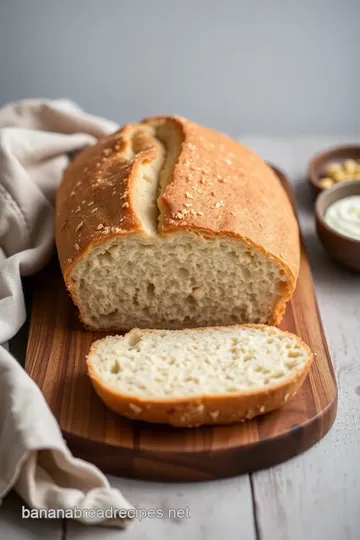
Think fresh baked bread right from your oven, with a crispy crust and an airy, chewy bread texture . let’s dive into the recipe and make some delicious memories together!
Essential Preparation Steps
So, here's a little secret for all of you aspiring home bakers: mise en place is your best buddy. it’s all about getting your ingredients measured and ready before diving into the actual baking.
Set out three cups of all-purpose flour , one-and-a-half teaspoons of sea salt , and half a teaspoon of instant yeast .
Oh! and don’t forget the one-and-a-half cups of warm water —we’re talking about about 100° f ( 38° c) here.
This little prep step will save you a lot of hassle later.
Time management is key. make sure you clear a day for this because the dough needs to rise for 12 to 18 hours .
This long rise gives our bread that incredible sourdough flavor . plan ahead, and your future self will thank you.
Organization is another must. keep your workspace tidy. and safety? always remember to use oven mitts when handling that hot dutch oven.
You don’t want to end up with a nasty burn while your bread is rising to fame!
Step-by-Step Process
Alright, let’s get right into it. Follow these easy peasy steps:
-
Mix the Dough : Toss together your flour, salt, and yeast . Gradually add your warm water while stirring until there are no dry patches left.
-
Initial rise : cover your bowl with plastic wrap or a kitchen towel. now comes the waiting game. let your dough sit at room temperature for 12 to 18 hours .
You’ll know it’s ready when the surface is bubbly and the dough has doubled in size—trust me, it’s magic!
-
Shape the Dough : Flour your countertop and gently turn out the dough. Fold it over itself a couple of times to form a loose ball.
-
Second Rise : Place that glorious ball on a floured surface, cover it, and let it rest for another hour or two until it’s all puffy.
-
Preheat Your Oven : About halfway through the second rise, crank your oven to 450° F ( 232° C) . Also, place your Dutch oven in the oven to heat up too.
-
Bake the bread : when the time’s right, carefully take your hot dutch oven out. drop in your dough, cover it, and bake for 30 minutes .
Remove the lid, and let it bake for an additional 10 to 15 minutes . you’re aiming for that quintessential golden-brown color.
-
Cool : Patience is key here! Transfer your bread to a wire rack and let it cool before slicing.
Expert Techniques
Now that you have the basics down, let’s elevate your game a bit. using quality flour pays off big time—trust me, skip the cheaper alternatives.
And remember, letting the dough rise undisturbed allows for the perfect fermentation in bread baking . always preheat your dutch oven thoroughly for that crispy crust bread you’ll love.
Have a backup plan—if your dough doesn’t quite rise like expected, don’t sweat it! Sometimes a little extra time is all it needs.
Success Strategies
Okay, let’s chat about some common pitfalls. first off, don’t rush the rising times . it’s tempting, but a good rise will give you that fantastic texture and flavor we all want.
If you’re not in a hurry, try the overnight bread recipe method. toss everything together at night, and you’ll wake up to the smell of glory!
Wanna make your life even easier? Make a batch ahead of time. This dough can chill in the fridge up to three days before baking! Talk about simple bread baking.
Wrapping it Up
So there you have it—a straightforward approach to creating no-knead artisan bread: simple & delicious right in your own kitchen.
With a little patience and love, you’ll have homemade artisan bread that will wow anyone.
Oh! And if you’re feeling adventurous, try adding some cheese or herbs to the dough for a twist. Trust me, you’ll be the king or queen of the kitchen.
Stay tuned for more baking tips and bread-making tricks . Happy baking!
Pro Tips & Secrets for No-Knead Artisan Bread
Oh man, if you’re diving into no-knead artisan bread: simple & delicious , congratulations! you’re in for a real treat.
Let’s chat about some pro tips and secrets you’re gonna want to tuck away.
Chef's Personal Insights
First things first, don’t rush the fermentation . the longer you let that dough sit, the more sourdough flavor bread vibes you’re gonna get.
12- 18 hours might sound like a long time, but trust me—it’s worth the wait! it allows the flavors to deepen like a fine wine.
Grab a book, binge-watch a series, or, hey, start a new hobby while you wait.
Time-Saving Techniques
Pro tip: if you’re looking for a quicker option, try the overnight bread recipe method. mix up your dough before hitting the sack, and by morning, you'll have a fluffy masterpiece waiting to be baked.
You can also prep the dough on the weekends and bake fresh bread during the week, cutting down on your daily cooking time!
Flavor Enhancement Tips
For added flavor, toss in some fresh herbs or even a bit of cheese during mixing. Ooh, imagine a bread scented with rosemary or thyme! Like, can you say yum ? And be generous with salt; it makes a world of difference!
Presentation Advice
Now, i know we shouldn’t judge a bread by its crust, but let’s be honest—a good-looking loaf makes everyone feel fancy.
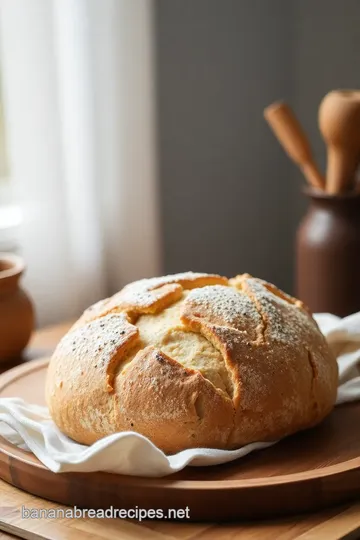
Aim for a lovely golden-brown color for that wow factor! dust it with some flour before baking for a rustic appearance.
It’s like your bread is putting on its sunday best.
Perfect Presentation: Make Your Bread Shine
Once you’ve baked your rustic bread , let’s talk about how to make it shine on the table.
Plating Techniques
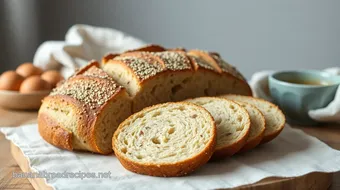
A simple wood cutting board is your best friend. slice the bread and lay it out like a work of art! you can also serve it alongside small bowls of olive oil and balsamic vinegar for dipping, adding a nice touch to your presentation.
Garnish Ideas
Fresh herbs like parsley or basil sprinkled on top are total show-stoppers. They add color and tell everyone that "Yeah, I made this—look at me!"
Color Combinations
When it comes to color combinations , think bright! Pair your loaf with vibrant veggies or a fresh salad. A splash of color makes everything more appetizing.
Visual Appeal Tips
Don’t just throw that bread on a plate—stack it, layer it, make it look inviting! a little extra effort in presentation goes a long way.
Trust me, your friends will think you’re a pro.
Storage & Make-Ahead: Keep it Fresh
We all know nothing beats the smell of fresh baked bread , but let’s be real—it doesn’t always get eaten in one sitting! Here’s how to store your masterpiece.
Storage Guidelines
Let that loaf cool completely before storing it. if you pile it while it’s still warm, you risk a steamed, soggy loaf.
Not cute! once cooled, wrap it in a kitchen towel or store it in a bread bag.
Preservation Methods
For longer storage, freeze your bread. slice it first, then you can just pop out a piece whenever you need a fix.
It’ll last about 3 months in the freezer without losing flavor. pretty nifty, right?
Reheating Instructions
When you’re ready to enjoy it again, just pop it in the oven at 350° F ( 175° C) for about 10 minutes. You’ll almost feel like you’re back in the bakery.
Freshness Duration
Homemade artisan bread is best eaten within the first couple of days, but honestly? It’ll still taste great for up to a week.
Creative Variations: Spice It Up!
Now, if you’ve got a wild side, there are so many ways to jazz up your easy bread recipe !
Flavor Adaptations
Feeling adventurous? Try adding roasted garlic for a punchy kick or even some sun-dried tomatoes for a touch of sweetness. The possibilities are endless!
Dietary Modifications
If you’re gluten-free, go ahead and swap in gluten-free flour . Just expect a different texture.
Seasonal Twists
In the fall, toss in some pumpkin puree or cinnamon for a seasonal delight. And in the summer? How about some fresh herbs and tomatoes?
Regional Variations
Experiment with regional twists! Add some Italian seasoning for a Mediterranean flair or cheese for a rich twist. There’s no wrong way to do this!
Complete Nutrition Guide: Bread That’s Good for You
I know this sounds like a lot, but understanding the nutritional value of artisan bread is key!
Detailed Breakdown
One slice of your homemade artisan bread packs about 120 calories —perfect for a hefty breakfast or hearty lunch. it’s primarily carbs, but don’t let that scare you! this bread is healthy in moderation.
Health Benefits
Just so you know, the fermentation in bread baking can actually improve gut health! There’s something magical about that process—hello, probiotics!
Dietary Considerations
Keep an eye on sodium if you’re watching your salt intake. While this bread is healthier than store-bought varieties, moderation is key for all of us.
Portion Guidance
One loaf usually serves 8-10 people depending on how hungry they are. It’s great for gatherings or just keeping the family fed!
Expert FAQ Solutions
Now, let’s hit the most common questions and concerns about this bread journey.
Common Questions
Why did my bread not rise? Well, it could be your yeast is expired—or you didn’t give it enough time. Patience is important, friend!
Troubleshooting Guide
If it’s too dense, try using a higher protein flour, like bread flour. That’ll help create that chewy bread texture we all crave.
Success Tips
Always, and I mean always, preheat your Dutch oven! This creates that crispy crust we all dream of.
Variations Explained
If you want to go the sourdough flavor bread route, make a starter ahead of time. It might take more effort, but wow, that flavor is unreal!
Encouragement
You totally got this! the beauty of baking bread without kneading lies in its simplicity. so don’t stress over the little things.
You’re bound to mess up a loaf here and there; i know i have! learn from it and keep trying.
Happy baking, my friend!
No-Knead Artisan Bread: Simple & Delicious Card
⚖️ Ingredients:
- 3 cups (360g) all-purpose flour
- 1½ teaspoons (9g) sea salt
- ½ teaspoon (2g) instant yeast
- 1½ cups (360ml) warm water (about 100°F/38°C)
- Additional flour for dusting
🥄 Instructions:
- Step 1: In a large mixing bowl, combine the flour, salt, and yeast.
- Step 2: Slowly add the warm water while stirring with a wooden spoon until no dry flour remains.
- Step 3: Cover the bowl with plastic wrap or a kitchen towel and let the dough rise at room temperature for 12-18 hours, or until the surface is bubbly and the dough has doubled in size.
- Step 4: Turn the dough out onto a floured surface and gently fold it over itself several times to shape it into a ball.
- Step 5: Transfer the shaped dough onto a floured area or parchment paper, cover with a towel, and let rest for 1-2 hours until puffy.
- Step 6: About 30 minutes before baking, preheat the oven to 450°F (232°C) with the Dutch oven inside.
- Step 7: Carefully remove the hot Dutch oven from the oven, place the dough into the pot, and cover it with the lid.
- Step 8: Bake for 30 minutes covered, then remove the lid and bake for an additional 10-15 minutes until golden brown.
- Step 9: Remove the bread from the pot and let it cool on a wire rack before slicing.
Previous Recipe: How to Bake Cinnamon Rolls: Soft & Gooey Delight for Cozy Mornings
Next Recipe: How to Bake Banana Muffins with Rich Chocolate Chips: A Delicious Journey