Bake Artisan Sourdough Bread: Crusty Delight
Looking for a crusty delight? My homemade artisan sourdough bread recipe delivers mouthwatering flavor through simple techniques and a love of baking. Join me!

- Discovering the Joy of Baking Artisan Sourdough Bread: Crusty Delight
- The Essential Ingredients Guide to Bake Artisan Sourdough Bread: Crusty Delight
- Mastering the Art of Professional Cooking: Bake Artisan Sourdough Bread: Crusty Delight
- Pro Tips & Secrets for Your Perfect Bake Artisan Sourdough Bread: Crusty Delight
- Perfect Presentation: Create a Visual Feast
- Storage & Make-Ahead: Keep It Fresh
- Creative Variations: Shake It Up!
- Complete Nutrition Guide: The Healthy Side of Sourdough
- Wrap Up: Your Sourdough Journey Awaits!
- Recipe Card
Discovering the Joy of Baking Artisan Sourdough Bread: Crusty Delight
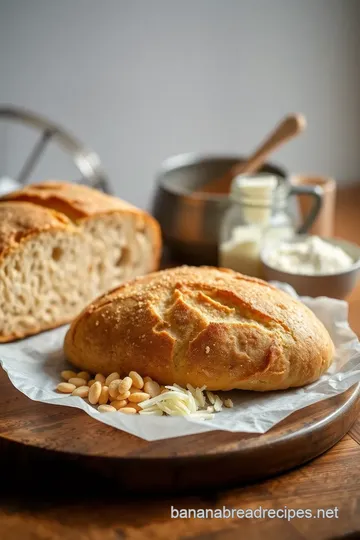
Have you ever sunk your teeth into a slice of fresh bread, the crust crackling and the interior soft and airy? let me tell you a little story about the first time i tried to bake artisan sourdough bread: crusty delight .
Picture this: i was at my friend's house, and that bread was just sitting there, warm and inviting. it was love at first bite! i knew right then and there that i had to try making it myself.
Fast forward to a thousand failed loaves, many flour-covered walls, and a surprisingly fierce passion for bread. trust me, if i can do it, so can you!
Baking bread isn’t just about mixing flour and water; it's about connecting with our roots. sourdough dates back to ancient egypt, when our ancestors noticed wild yeast in the air could turn a simple mix of flour and water into something magical.
Nowadays, it’s gaining popularity across the globe for its unique flavor and the art of homemade sourdough . friends, it’s not just a loaf; it’s a piece of history!
Now, let’s chat about what you need to know before diving in. this recipe falls into the medium difficulty level.
It does require a bit of finesse with dough and some understanding of the fermentation process , but hey, don't sweat it! it’s perfect for beginners eager to learn essential sourdough baking tips .
You'll need some time—prepare for about 12- 14 hours total, including all the fermentation magic. but that’s mostly resting time, so you can chill or binge-watch your fave show while it rises.
And let’s get down to the nitty-gritty: the costs. a loaf of this rustic heaven will run you about $2, depending on what ingredients you’ve got on hand.
Plus, you yield about 12 slices of hearty goodness—you can’t beat that! if you’re into artisanal bread making , you're bound to save a coin or two once you get the hang of it.
Why Sourdough?
Okay, let's talk benefits. first off, the nutritional benefits of sourdough are pretty impressive. thanks to the natural fermentation, it’s easier to digest and lets your body absorb minerals better.
Plus, it’s lower on the glycemic index, which is a fancy way to say it won’t spike your blood sugar like a sugary pastry would.
Isn’t that just awesome?
Besides health perks, this bread is a serious showstopper! it's a great centerpiece for parties, or you can simply slather a thick slab with creamy butter and call it a day.
Imagine serving it with a soup on a cozy winter night or using it for a killer sandwich—oh boy! the versatility of this recipe is one of its best unique selling points.
Unlike some straightforward bread recipes, the flavor of sourdough is so distinct. you can play around with different sourdough combinations —add herbs, cheese, or even a bit of sweetness if you’re feeling adventurous.
Really, the possibilities are endless!
Alright, are you ready for it? Let’s move to the fun stuff—what you need to actually make this crusty delight ! Grab your apron, and let’s get baking.
The Essential Ingredients Guide to Bake Artisan Sourdough Bread: Crusty Delight
So, you’re ready to dive into the glorious world of sourdough? awesome! this isn’t just any bread—this is bake artisan sourdough bread: crusty delight .
And trust me, once you get the hang of this, you’ll never want to eat store-bought bread again. let me walk you through the essential ingredients that’ll transform your kitchen into a mini bakery.
Premium Core Components
First off, let’s talk measurements. we’re all about precision here. you need around 500g (4 cups) of all-purpose flour, 350g (1 ½ cups) of room temperature water, 100g (½ cup) of active sourdough starter, and 10g (2 tsp) of salt.
Simple, right?
Now, quality indicators are key. look for flour that’s unbleached and has a high protein content—that’s what gives you that chewy crusty outside.
Your sourdough starter should be bubbly and smell yeasty, not funky. and remember: once you have your ingredients set, storage guidelines matter.
Keep your flour in an airtight container in a cool, dry place. your sourdough starter? it needs to be fed regularly and can live happily in the fridge if you’re not using it every day.
Speaking of freshness, always choose the freshest ingredients. check for flour that’s within its shelf life and avoid any with a rancid odor.
If you want to see a flour ninja move, just give it a little sniff—trust your senses!
Signature Seasoning Blend
Okay, let’s spice things up! you might think bread is just about flour and water, but seasoning makes all the difference.
Think about adding essential spice combinations like garlic powder or onion powder for that kick! a little oregano or rosemary can also elevate your sourdough game to new heights.
And don’t forget the herb selections . fresh herbs can make a substantial difference in flavor. pair them with complementary ingredients like extra virgin olive oil.
Oh my gosh, that aroma will get you every time!
Smart Substitutions
Now, what if you’re out of a key ingredient? no worries! let’s chat about common alternatives. got no sourdough starter? you can use an equal amount of store-bought starter (but fair warning: your fermentation process might vary a bit).
And if you’re playing the dietary modification card, how about substituting half that all-purpose flour with whole wheat? it’s heartier and has some awesome nutritional benefits of sourdough.
Trust me, your body will thank you!
Oh, and when it comes to emergency replacements , if you run out of salt, you can use unsalted butter instead—just bear in mind your dough hydration levels will change a bit!
Kitchen Equipment Essentials
For that perfect loaf, having the right tools is a must! you’ll want a large mixing bowl, a reliable dutch oven, and a kitchen scale.
Those nifty little gadgets help you nail the bread baking essentials . no scale? use measuring cups, but don’t blame me if your bread’s a little wonky!
A sharp knife or lame for scoring bread dough is crucial too. It's the artistic touch that gives your bread a unique personality!
Wrapping It All Up
Now, let’s put this all together as you prepare to bake artisan sourdough bread at home. once you’ve got your ingredients and equipment ready, you’re already halfway there! the way the dough behaves during the fermentation process will shape how your crusty delight turns out.
Stay tuned for the step-by-step instructions coming up next, because i promise—when you nail this, it’ll be your go-to for rustic bread recipes and more!
Just remember, whether you’re a bread newbie or a seasoned pro, use these tips to create your own flavorful sourdough variations. You’ll be serving up warm slices before you know it!
Mastering the Art of Professional Cooking: Bake Artisan Sourdough Bread: Crusty Delight
When it comes to baking homemade sourdough, nailing the professional cooking method can make all the difference. let's dive into some essential preparation steps, step-by-step processes, expert techniques, and strategies for success as we explore this delightful journey of artisan bread making.
Essential Preparation Steps
First off, let’s break down a fancy term you might hear - mise en place . it just means "everything in its place.
" before you start, gather your ingredients and tools. it’ll save you from diving into the pantry mid-recipe! for our sourdough bread recipe , you’ll need all-purpose flour, water, your active sourdough starter, and salt ready.
Time management tips are key, too. depending on the temperature in your kitchen, fermentation can take longer. make a mental note! organization strategies like setting timers can keep everything on track.
It’s all about that constant checking. and, of course, don’t skip the safety considerations . always keep your workspace clean and sanitize the tools you’ll use.
Step-by-Step Process
Here’s where we get into the nitty-gritty. Follow these numbered instructions to perfect your loaf!
-
Mix the Ingredients: Combine the 500g of flour and 350g of water until no dry flour hangs around.
-
Add Sourdough Starter: Incorporate 100g of your active starter into the mix with a spatula.
-
Sprinkle in Salt: Add 10g of salt . Mix by hand - it’s messy but worth it!
-
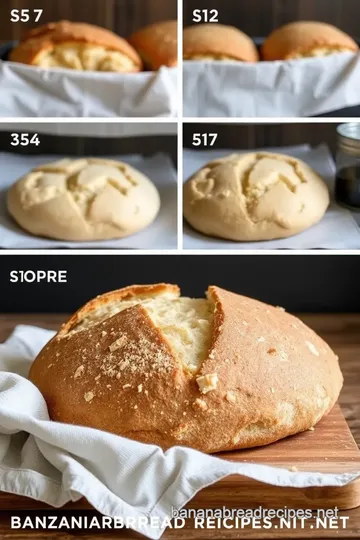
Bulk Fermentation: Cover your bowl. Rest it for 4- 6 hours . Look for that dough to double in size!
-
Stretch and Fold: Every 30 minutes for the first 2 hours , gently stretch and fold it. You're building gluten strength here.
-
Pre-shape the Dough: After bulking, turn it out, shape it round and let it relax for 30 minutes .
-
Final Shape: Time to give it a tight shape! A round or oval loaf works.
-
Proofing: Place it seam side up in a floured banneton. Let it proof 2- 4 hours at room temp or overnight in the fridge.
-
Preheat the Oven: About 30 minutes before baking, preheat to 450° F ( 230° C) with a Dutch oven inside.
-
Score the Dough: After proofing, score the top with a lame or sharp knife—you want that beautiful crust.
-
Bake: Lift your loaf into the Dutch oven, cover, and bake for 30 minutes . Uncover and bake for another 15 minutes until golden brown.
-
Cool: Let it cool on a rack for at least 1 hour . Patience pays off!
Expert Techniques
You’re going to want that crusty bread perfection, right? maintaining temperature control is crucial. the ideal baking time is 45 minutes to reach that golden exterior and airy bread interior.
Pay attention; it’ll start smelling amazing when it’s close!
Here’s a critical step: check the internal temp. when it hits 200° f ( 93° c) , your loaf is done! but don’t worry too much if it doesn’t look perfect—the beauty of homemade sourdough is in its rustic charm.
Success Strategies
Alright, let’s chat about those common pitfalls. one mistake is not measuring accurately. get that kitchen scale out— dough hydration levels matter.
A tacky, not sticky, dough is what you want. and those breadproofing methods ? don’t rush! if it’s cool in your kitchen, the dough might need extra love.
And if you’re like me, you might want some make-ahead options . You can prepare and shape the dough, then refrigerate it overnight for a fresh-baked morning treat!
Now, take a deep breath. You’re set to Bake Artisan Sourdough Bread: Crusty Delight like a pro! Oh, and don’t forget to save a slice for later, because this crusty delight pairs perfectly with rich soups or a good craft beer!
Additional Information
Keep this journey in mind as you explore the world of artisan bread making! there’s so much to learn and experiment with.
Whether it’s adding herbs or trying a whole wheat sourdough recipe, each bake brings something special to the table. look into into those flavorful sourdough variations and enjoy every crumb you create.
Happy baking!
Pro Tips & Secrets for Your Perfect Bake Artisan Sourdough Bread: Crusty Delight
Alright, folks! if you’re diving into the world of sourdough bread making, you’ve come to the right place. with sourdough bread recipes floating around everywhere, let me share some solid pro tips and secrets i’ve picked up along my baking journey.
Chef's Personal Insights
First off, embrace your inner baker! don’t stress if your first loaf isn’t perfect. the beauty of bread baking lies in its imperfections.
Each loaf tells a story. "mistakes" can often lead to the best creations.
Time-Saving Techniques
Wanna save a bit of time? mix the dough in the evening and let it bulk ferment overnight. you’ll wake up to a beautifully risen dough, ready for shaping.
Trust me, that extra sleep is worth it!
Flavor Enhancement Tips
To kick up the flavor of your homemade sourdough, consider adding a splash of apple cider vinegar or some honey to the mix.
This gives your bread a deeper, tangy taste that perfectly complements the crusty exterior.
Presentation Advice
When it comes to presentation, you want your bread to look as good as it tastes. use a lame or sharp knife to score the dough before baking; these neat cuts not only look fancy but help control how the bread expands in the oven.
A little artistry goes a long way!
Perfect Presentation: Create a Visual Feast
Great bread deserves to be served beautifully, right? Let’s talk plating techniques and how to make your crusty delight shine.
Garnish Ideas
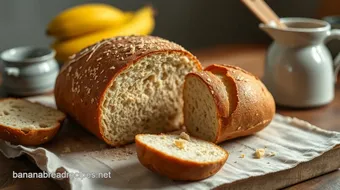
Once your loaf cools, consider slicing it into thick pieces and serving it on a rustic wooden board. a sprinkle of fresh herbs or a drizzle of olive oil can elevate the visual appeal.
Color Combinations
Don’t shy away from colors! If you’re serving your sourdough with dips or spreads, think vibrant. Pair it with bright red roasted peppers or a fresh green pesto for an eye-catchy spread.
Visual Appeal Tips
Why not get creative with your bread pairs? a craft beer alongside your crusty delight can make for an impressive presentation.
Trust me; your friends will be snapping pics quicker than you can say “sourdough!”
Storage & Make-Ahead: Keep It Fresh
Let’s talk about keeping that amazing loaf fresh. We can’t have our hard work go stale!
Storage Guidelines
Once cooled, slice it up and keep it in a paper bag or wrapped in a clean kitchen towel. Avoid plastic; it traps moisture, which can lead to a soggier loaf.
Preservation Methods
Frozen homemade bread is a game changer. Wrap slices tightly in plastic, then foil, and toss them in the freezer. Just pop them in the toaster when you need a fix!
Reheating Instructions
To get that fresh-out-of-the-oven vibe, reheat slices in the oven at about 350° F for 5 to 10 minutes. Your kitchen will smell like a bakery in no time!
Freshness Duration
Home-baked sourdough is freshest in the first few days. Enjoy it right away, but if it lasts longer, don’t worry—freezing it will keep it delightful for up to three months!
Creative Variations: Shake It Up!
Feeling adventurous? Let’s spice things up with some flavorful sourdough variations !
Flavor Adaptations
Try throwing in some olives or sun-dried tomatoes for a Mediterranean twist. This makes your bread not only delicious but a conversation starter too!
Seasonal Twists
What about a pumpkin spice sourdough come fall? Just add pumpkin puree and a few spices like cinnamon and nutmeg. It’s a seasonal hit!
Regional Variations
Want to celebrate regional flavors? How about adding a little smoked paprika or cheddar cheese for that Southern flair? Seriously, the options are endless!
Complete Nutrition Guide: The Healthy Side of Sourdough
Let’s not forget, baking isn’t just about taste; it’s also about nutrition!
Detailed Breakdown
Homemade sourdough offers nutritional benefits that bring great balance to your diet. You’re looking at good carbs, some protein, and minimal sugars. Not bad for your crusty delight!
Dietary Considerations
If you’re gluten-sensitive, try a gluten-free flour blend . Just remember to check those hydration levels since not all flours behave the same.
Portion Guidance
With about 200 calories per slice , savor each bite. Pair with a magnum opus like vegetable soup for a hearty meal.
Common Questions Answered
People often ask about dough hydration levels when working with sourdough. A wetter dough leads to more open crumbs, while a drier dough retains a denser texture. Finding that balance is key!
Wrap Up: Your Sourdough Journey Awaits!
Now that you’ve got all the sourdough baking tips and hacks in your back pocket, it’s time to get baking! don’t forget, each loaf tells a story.
If things don’t go as planned, laugh it off and turn it into a fun meal. baking is as much about the experience as it is about the end product.
So roll up those sleeves and dive into bake artisan sourdough bread: crusty delight —your kitchen and your taste buds are in for a treat! happy baking!

Bake Artisan Sourdough Bread: Crusty Delight Card
⚖️ Ingredients:
- 500g (4 cups) all-purpose flour
- 350g (1 ½ cups) water, room temperature
- 100g (½ cup) active sourdough starter
- 10g (2 tsp) salt
🥄 Instructions:
- Step 1: In a large mixing bowl, combine the flour and water. Mix until no dry flour remains.
- Step 2: With a rubber spatula, mix in the active sourdough starter until fully incorporated.
- Step 3: Sprinkle salt over the dough and mix by hand until well combined.
- Step 4: Cover the bowl with a damp cloth; let it rest at room temperature for 4-6 hours (until doubled in size).
- Step 5: Every 30 minutes for the first 2 hours, gently stretch and fold the dough 3-4 times.
- Step 6: Turn the dough onto a lightly floured surface; shape it into a round and let it rest for 30 minutes.
- Step 7: Shape the dough into a tight round (or oval) loaf.
- Step 8: Place the loaf seam side up in a well-floured banneton or bowl; cover and let proof for 2-4 hours at room temperature or overnight in the refrigerator.
- Step 9: 30 minutes before baking, preheat the oven to 450°F (230°C) with a Dutch oven inside.
- Step 10: Carefully turn the loaf onto a sheet of parchment paper and score the top with a lame or knife.
- Step 11: Use the parchment to lift the loaf into the preheated Dutch oven. Cover and bake for 30 minutes, then uncover and bake for an additional 15 minutes until golden brown.
- Step 12: Remove from the oven; let the bread cool on a wire rack for at least 1 hour before slicing.
Previous Recipe: How to Bake Maple Pecan Sticky Buns Delight for a Cozy Morning
Next Recipe: Discover My Grandmother's Blueberry Bread with Tangy Lemon Glaze!