Rustic Artisan Bread Recipe
Craving that quality bakery experience at home? Discover my beloved Rustic Artisan Bread recipe—golden crust, chewy interior, and all the tips to make it perfect!

- The Joy of Baking Rustic Artisan Bread
- A Bit of Bread History
- Let’s Talk About Time and Cost
- Why You’ll Love This Bread
- Ready to Gather Ingredients?
- Essential Ingredients Guide for Baking Artisan Bread
- Unleashing Your Inner Baker: Mastering Professional Cooking Techniques
- Pro Tips & Secrets for Perfect Rustic Artisan Bread
- Perfect Presentation — A Visual Feast
- Storage & Make-Ahead Techniques
- Creative Variations to Explore
- Complete Nutrition Guide
- Expert FAQ Solutions
- Conclusion — Your Baking Adventure Awaits!
- Recipe Card
The Joy of Baking Rustic Artisan Bread
Have you ever walked past a quality bakery and been hit by that warm, yeasty smell wafting through the air? oh my gosh, it’s like a hug for your senses! i remember the first time i experienced it.
I was wandering around town, feeling kinda lost, and then suddenly—bam! a bakery caught my eye. i stepped in, and that intoxicating aroma of freshly baked bread enveloped me.
It was a moment of pure joy! ever since that day, i started experimenting with making my own bread at home.
Baking your own bread, especially a rustic artisan bread , is not only rewarding; it’s also a delightful way to connect with your roots.
This isn't just bread; it's a celebration of simple ingredients coming together. so, let’s dive into this step-by-step bread recipe that will surely turn heads and elevate any meal!
A Bit of Bread History
Artisan bread has deep roots stretching back centuries. originating from european baking traditions, it was often made in small batches using traditional baking methods .
Think of farmers and bakers handcrafting loaves using what they had on hand. today, the art of rustic bread baking is alive and kicking, showing up in craft bakeries and home kitchens alike, celebrated for its bread crust texture and chewy, delicious interior.
In modern times, it’s cool to see how artisan bread has become a staple for gatherings, family dinners, and even lazy breakfasts.
Whether you’re making a whole grain bread or a classic loaf, people appreciate the effort that goes into it. honestly, the satisfaction of pulling that crumbly loaf out of the oven is unbeatable!
Let’s Talk About Time and Cost
Baking this rustic bread takes a bit of patience, but the prep is super chill. you’ll spend about 20 minutes getting things rolling, and then there’s a bulk fermentation time of 1 hour where you can grab a coffee or binge-watch your favorite show.
The total time from start to finish? roughly 2 hours , including cooling. so, while it’s not exactly a rush job, you can definitely fit it into a cozy day at home.
As for costs? this bread doesn’t break the bank. with just some quality bakery ingredients like flour, yeast, and salt, you can whip up a gorgeous loaf that yields about 12 servings .
Picture impressing your guests with a homemade chewy artisan loaf while keeping it budget-friendly—total win!
Why You’ll Love This Bread
Let’s chat about the key benefits . first off, there’s something so satisfying about mastering homemade bread techniques . once you get the hang of the dough fermentation process , it feels like you’ve unlocked a secret superpower.
On the health side, this rustic creation is a great source of fiber, especially if you use whole grain flour.
Plus, you can opt for healthy bread recipes , adding in seeds or herbs for a nutritional boost. who can resist that lovely crunch or the enhanced flavors from experimenting with herbs?
This bread is perfect for special occasions . whether you’re slapping together an impressive charcuterie board or serving it up with soups and salads—your friends will be clamoring for your secret recipe.
Don’t worry; i won’t tell!
Ready to Gather Ingredients?
Are you as excited as I am? Rustic artisan bread is just waiting for you to take it on. So grab your apron, and let’s dive into the ingredients you’ll need, because trust me, your kitchen is about to smell heavenly!
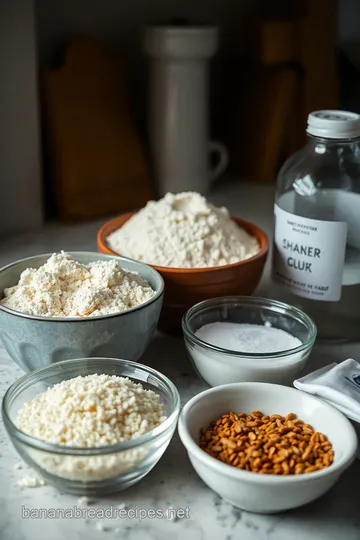
Ingredient List
- 3 cups (360g) all-purpose flour
- 1 cup (120g) whole wheat flour
- 1 ½ teaspoons (8g) salt
- 1 teaspoon (4g) instant yeast
- 1 ½ cups (350ml) lukewarm water
With just these simple ingredients, you're well on your way to creating a sturdy loaf that’s guaranteed to impress. so, let’s embrace the world of baking with yeast and get this wonderful bread journey started.
What could be better than crafting artisan loaves in your kitchen?
Stay tuned for the step-by-step instructions, and let’s make some delicious memories!
Essential Ingredients Guide for Baking Artisan Bread
You know, nothing beats the smell of fresh bread wafting through the kitchen. if you've ever dreamt of recreating that quality bakery experience at home, you're in the right spot! today, we're diving into the essentials—those key ingredients and tools you can't live without.
Let’s take this journey together!
Premium Core Components
When you're crafting your rustic bread baking masterpiece, let's talk about those premium core components . Here’s what you need to know:
- Detailed Measurements: For the perfect loaf, stick to the measurements: 3 cups of all-purpose flour (360g), 1 cup of whole wheat flour (120g), 1 ½ teaspoons of salt (8g), and 1 teaspoon of instant yeast (4g). Your dough will thank you!
- Quality Indicators: Look for flour with a high protein content for a chewy artisan loaf. It’ll give you that sought-after bread crust texture .
- Storage Guidelines: Keep your flour in an airtight container in a cool, dark place. It'll stay fresh for about 6-12 months in the pantry.
- Freshness Tips: Always check for a nice, nutty aroma. If it smells stale, ditch it!
Signature Seasoning Blend
The right spices and herbs can turn your loaf into a flavor bomb. Here’s how to craft that signature seasoning blend :
- Essential Spice Combinations: Think classic! A little sea salt goes a long way in enhancing that fresh baked flavor.
- Herb Selections: Toss in rosemary or thyme to elevate your artisan bread recipe. These herbs really pop when baked!
- Flavor Enhancers: Trying adding a splash of olive oil in your dough—it brings moisture and deliciousness.
- Regional Variations: In the South? Consider incorporating jalapeños or cheddar for a twist on crusty bread variations.
Smart Substitutions
Sometimes you run out of an ingredient, and that’s okay! Here’s how to make smart substitutions :
- Common Alternatives: Used up all-purpose flour? Go for half whole wheat flour and half all-purpose for a nutty flavor.
- Dietary Modifications: Need gluten-free options? Look for gluten-free flour blends particularly labeled for bread.
- Emergency Replacements: If you're out of yeast, you can sometimes use baking powder, though it’ll alter the texture, so keep that in mind.
- Seasonal Options: Don’t forget about seasonal flavors! Fall means pumpkin spice bread, while summer hummingbirds bring banana bread to mind.
Kitchen Equipment Essentials
Now that you've got your ingredients nailed down, let’s talk about the kitchen equipment essentials you’ll want:
- Must-Have Tools: A good mixing bowl, a bench scraper, and a Dutch oven. The Dutch oven will help give your crust that bakery-level crunch.
- Alternative Equipment Options: Don’t have a Dutch oven? You can use a baking stone instead. Just create steam in your oven by placing a tray of water below your bread.
- Preparation Tips: Keep everything tidy; it lets you focus on the dough! And for a perfect rise, ensure your kitchen is warm and cozy.
- Storage Solutions: Keep your tools organized. A designated baking drawer can save you from the “where's my bench scraper?” panic!
Wrapping It Up
So there you have it—your essential ingredients guide to achieving that quality bakery experience at home . whether you’re taking your first steps into homemade bread techniques or you're a seasoned pro, the right ingredients and equipment can make all the difference.
From the dough fermentation process to shaping that perfect chewy artisan loaf , you’re all set for your baking adventures.
Now, let's get into those step-by-step instructions for that mouthwatering rustic artisan bread !
Unleashing Your Inner Baker: Mastering Professional Cooking Techniques
Alright, buddy, let’s roll up those sleeves and get ready to dive into the magical world of professional cooking methods .
Whether you’re gearing up for a dinner party or just want to impress yourself with some quality bakery vibes, these tips will elevate your game.
Trust me; i’ve been there, and i’m excited to share what i’ve learned from the countless loaves of rustic artisan bread i've baked!
Essential Preparation Steps
Before you even think about turning on that oven, let’s get our ducks in a row. mise en place is a fancy french term, but it just means having everything set up before you start.
Measure those ingredients—flour, water, yeast—and get ‘em ready! it’s like being the boss in your kitchen, and it saves you from frantic runs to the pantry in the middle of mixing.
Time management is key, folks. start with the things that take longer, like dough fermentation . while you’re waiting, chop herbs or get other ingredients prepped.
It’s all about using that wait time effectively. and remember — keep your workspace organized! a tidy kitchen makes for a smooth cooking experience.
Oh, and let’s not forget safety. always keep an eye on those hot surfaces and be careful with your sharp tools.
You don’t want a trip to the er because you were too busy kneading dough like a rock star!
Step-by-Step Process
Now we’re getting to the good stuff — the actual cooking! Here’s how to make that chewy artisan loaf shine:
-
Combine Dry Ingredients: In a large mixing bowl, whisk together your all-purpose and whole wheat flour, salt, and instant yeast.
-
Mix It Up: Slowly pour in that lukewarm water while stirring until you see a rough dough forming.
-
Bulk Fermentation : Cover it with a clean towel and let it sit at room temperature for about 1 hour or until it has doubled in size .
-
Shape It: Flour your surface, plop the dough on there, and shape it. Don’t overdo it—gentle hands are key!
-
Second Rise: Set the molded dough on parchment paper, cover, and let it rest for another 30- 60 minutes .
-
Heat Things Up: Preheat your oven to 450° F ( 230° C) and ensure your Dutch oven is inside, heating up.
-
Score the Bread: Carefully transfer your dough to the Dutch oven and give it a nice score on top with a sharp knife to let that steam escape.
-
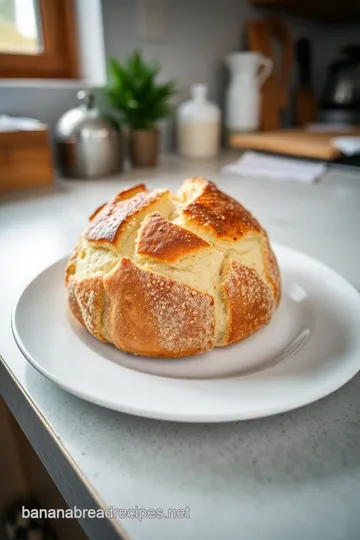
Bake time: cover it and bake for 30 minutes , then remove the lid and let it bake for an additional 10- 15 minutes .
You’re looking for that gorgeous golden crust.
-
Cooldown time: after you pull it from the oven, resist the urge to slice right away. let it cool on a wire rack for 30 minutes ! seriously, this step is crucial for the perfect bread crust texture .
Expert Techniques
Here’s where I drop some wisdom bombs. To step up your baking game:
- Hydration is Key: If you want a nice, open crumb, play around with the water content a bit based on your flour’s absorption. This can make your bread sing!
- Fermentation Magic: Ever tried letting your dough sit in the fridge overnight? It’s a game changer for flavor, thanks to slow fermentation.
- Get Your Thermometer Out: The internal temperature should hit about 200° F ( 93° C) when it’s ready. It’s the only time I say, “Trust a machine!”.
Success Strategies
Let’s not ignore the common pitfalls, shall we?
- Don’t Rush It: Give that dough the time it needs to rise. No one likes dense bread.
- Quality Matters: Invest in quality bakery ingredients . You know the difference when you bite into a slice.
- Experiment: If you’re feeling adventurous, throw in some herbs or seeds. It’s fun, and it brings texture to your loaf.
The beauty of baking is the journey, not just the destination. you might face a few hiccups along the way—my first loaf was a complete brick! but hey, it only gets better with practice.
Transition to Additional Information
So there you have it! those are your stepping stones into the world of professional cooking methods and baking a delicious artisan bread .
Seriously, you’re just a few flour dusted moments away from impressing your friends and family with that quality bakery experience right in your kitchen.
Now, if you’re hungry for more tips, tricks, and tasty recipes, let’s dive into some additional information next!
Pro Tips & Secrets for Perfect Rustic Artisan Bread
Let’s kick this off with some of my personal best-kept secrets when baking Rustic Artisan Bread. Honestly, it’s all about enjoying the process. So, let’s dig in!
Chef's Personal Insights
Baking is an art and a science, you know? trust your instincts. if the dough feels too dry, throw in a splash more water.
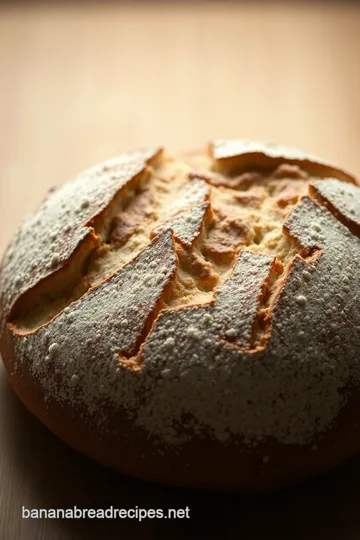
For that incredible bread crust texture , keep an eye on the dough. you want it soft but not a sticky mess.
Time-Saving Techniques
Got a busy day? worry not! you can make this dough ahead of time and let it hang out in the fridge overnight.
This slows down the dough fermentation process and brings out those nutty flavors—even more taste the next day!
Flavor Enhancement Tips
Try experimenting with herbs or spices in your bread. a bit of rosemary or garlic powder goes a long way.
Trust me, your taste buds will thank you! and if you like a chewy artisan loaf, go for higher hydration (more water), and you’ll thank yourself when you’re biting into that warm loaf!
Presentation Advice
When it’s time to show off your bread, don’t just toss it on a plate! a little presentation goes a long way.
Think rustic : place your loaf on a wooden cutting board, sprinkle some flour around, and maybe a few sprigs of herbs.
Perfect Presentation — A Visual Feast
Alright! So your bread is baked and that smells amazing! But let’s not stop there. Here’s how to make it look even more appetizing.
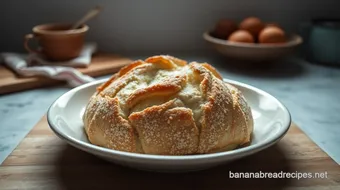
Plating Techniques
Slice the bread into thick pieces and arrange them neatly. Don’t just stack them haphazardly , let them cascade slightly. It creates a cozy vibe, perfect for a dinner party!
Garnish Ideas
Fresh herbs like thyme or basil can add a pop of color. Or, drizzle a little olive oil on the side with a pinch of sea salt—a fancy touch that makes you feel like you just walked into a quality bakery !
Color Combinations
Pairing is key! Think light, fresh veggies or a rich tomato soup. Those colors contrast beautifully with the golden crust.
Storage & Make-Ahead Techniques
After all that hard work, you want to keep your bread fresh, right? Here are my go-to tips!
Storage Guidelines
Wrap your bread in wax paper or a cotton kitchen towel, then place it in a paper bag. This keeps it fresh without softening that lovely crust.
Preservation Methods
If you’re not eating it within a few days, feel free to slice and freeze it. When you want some, just pop it in the toaster, and boom—fresh bread again!
Reheating Instructions
For a quick reheat, toss it in a low oven for about 5- 10 minutes . This crisps it up just like it just came out of the oven!
Freshness Duration
Generally, it’ll stay tasty for about 3-4 days at room temp. After that, it’s best to freeze those slices.
Creative Variations to Explore
Who doesn’t love a good twist? Here’re some fun ideas to play with!
Flavor Adaptations
Got a favorite cheese? Go wild! Fold in loaded cheddar or some crumbled feta. Yum!
Dietary Modifications
Trying to be a bit healthier? Swap out half of your white flour for whole grain flour. It keeps your loaf fluffy with a nutrient boost.
Seasonal Twists
During the fall, add some cinnamon or pumpkin purée —it’ll give your bread that warm, cozy feeling.
Regional Variations
If you like it rustic, how about some Italian herbs ? Or go French with a little wine in the dough. The possibilities are endless!
Complete Nutrition Guide
When you bake, do you think about nutrition? Here’s a quick lowdown.
Detailed Breakdown
A slice of this artisan bread is approx 130 calories , with a bit of protein and fiber too.
Health Benefits
Whole grain flour means more nutrients and a hearty source of fiber. Perfect for those who want healthy bread recipes that don't skimp on flavor.
Dietary Considerations
This bread is not gluten-free, but you could easily swap in a gluten-free flour mix if that’s your jam.
Portion Guidance
One loaf makes about 12 servings . Great for sharing—or for enjoying by yourself throughout the week. No judgment here!
Expert FAQ Solutions
Got questions? I’ve got answers!
Common Questions
What's the secret to a crunchy crust? Steam in the oven—like I mentioned before, a pan with water works wonders!
Troubleshooting Guide
Dough not rising? Make sure your yeast is fresh. Old yeast can’t work its magic.
Success Tips
Don’t rush the cooling process! It needs to rest after baking or it’ll feel gummy inside.
Variations Explained
Swapping flours? Just keep in mind the liquid ratios might need adjusting based on what you use.
Conclusion — Your Baking Adventure Awaits!
Baking your own rustic artisan bread can be a game changer. it transforms simple moments into flavorful experiences. with these tips and tricks, you'll be on your way to mastering your own quality bakery experience at home.
So grab your apron, put on some music, and enjoy this delicious journey. happy baking!
Rustic Artisan Bread Recipe Card
⚖️ Ingredients:
- 3 cups all-purpose flour
- 1 cup whole wheat flour
- 1 ½ teaspoons salt
- 1 teaspoon instant yeast
- 1 ½ cups lukewarm water
🥄 Instructions:
- Step 1: In a large mixing bowl, whisk together the all-purpose flour, whole wheat flour, salt, and instant yeast.
- Step 2: Gradually add lukewarm water while stirring with a wooden spoon until a rough dough forms.
- Step 3: Cover the bowl with a clean kitchen towel. Let the dough rise at room temperature for 1 hour, or until it has doubled in size.
- Step 4: Lightly flour a clean surface, turn the dough out, and shape it gently into a ball.
- Step 5: Place the shaped dough onto a floured piece of parchment paper. Cover with a towel and let it rest for another 30-60 minutes.
- Step 6: While the dough is resting, preheat the oven to 450°F (230°C) and place a Dutch oven inside.
- Step 7: Carefully transfer the dough into the preheated Dutch oven. Score the top with a sharp knife to allow steam to escape during baking.
- Step 8: Cover with the lid and bake for 30 minutes. Remove the lid and bake for an additional 10-15 minutes, or until the crust is golden brown.
- Step 9: Remove the bread from the oven and let it cool on a wire rack for at least 30 minutes before slicing.
Previous Recipe: How to Make Texas Toast: 5 Amazing Ways to Enjoy It!
Next Recipe: How to Create Delicious North Liberty Grilled Stuffed Peppers!